RAIDvancement Guides — Published Guides (21)
This page lists all published guides on RAIDvancement, a premium LGBTQIA2+-inclusive MMORPG community covering WoW, FFXIV, GW2, RuneScape, OSRS, and Black Desert Online.
Visit the full Guides section
Why TBN Carries the Kefka Check: Structural Utility in FFXIV’s 7.51 Ultimate Meta
Category: Final Fantasy XIV
Difficulty: Advanced
Author: RAIDvancement
URL: https://raidvancement.com/guides/z3cxw94m37q7suo
Summary: The Patch 7.51 Ultimate raid introduces severe mechanical checks and tight damage tuning. This technical guide bypasses generic job tier lists to analyze the exact numerical break-points, mitigate mitigation frameworks, and review recovery thresholds required for clearing the Kefka encounter. It evaluates structural job utility against independent execution ease. This breakdown provides actionable optimization data for progression statics and solo-queue party finder groups looking to maximize their clear efficiency.

Mechanics tested by The RAIDvancement Review Team Part 1: The Mechanical and Numerical Reality of Patch 7.51 The seventh Ultimate-difficulty raid introduced in Patch 7.51 presents an unprecedented jump in strict damage checks and rapid raid-wide mitigation requirements. Clearing this fight requires moving away from casual optimization habits. Teams must understand the exact mechanical parameters set by the encounter design. [Phase 1-3 Baseline] -> Continuous 90-second mitigation loops (10-15% mitigation minimum) [Enrage Boundary] -> Required team raid DPS baseline exceeding ~142,000 rDPS [Target Window] -> Strict 12-second burst windows inside chaotic movement phases The Numerical Bottlenecks The Enrage Boundary: Aggregated logs from early clears establish that the absolute baseline for beating the final enrage requires a team raid DPS (rDPS) exceeding 142,000 . Falling below this value by even 0.5% results in a wipe. Mitigation Check Frame Windows: The signature raid-wide mechanics demand continuous 90-second mitigation loops. Failing to stack a minimum of two 10% damage-reduction actions (such as Feint and Addle ) alongside a percentage-based shield results in instant death for non-tank roles. Burst Optimization: The boss regularly shifts targets or becomes untargetable during major movement puzzles. Standard 120-second rigid rotations lose significant value. The meta prioritizes jobs capable of pooling resources to dump 45,000+ potency into precise 12-second windows immediately following major mechanics. Part 2: Structural Synergy vs. Solo Queue Party Finder (PF) Reality In high-tier raiding, there is a massive divide between an organized static group utilizing coordinated voice communication and the uncoordinated environment of the solo-queue Party Finder. A job that delivers incredible theoretical value under perfect conditions can become a liability when raiding with shifting groups of strangers. To survive and consistently clear high-end content independently, your job selection must prioritize high personal defense, straightforward execution loops that leave mental room for mechanics, and non-negotiable party utility. Dark Knight (DRK) Primary Ultimate Function: Magical Tank Buster Mitigation & Burst Alignment Solo Queue Strength Metric: Extreme ( The Blackest Night absorbs 25% of max HP, saving unmitigated co-tanks) Mechanical Execution Ease: High (Rigid burst phase allows for easy mechanical focus during downtime) Viper (VPR) Primary Ultimate Function: High Sustained Pure Melee DPS Solo Queue Strength Metric: High (Massive personal damage output independent of external party buff alignment) Mechanical Execution Ease: Medium (Fast global cooldowns but requires no positionals during major burst windows) Dancer (DNC) Primary Ultimate Function: Dynamic Burst Alignment & High-Value Mobility Support Solo Queue Strength Metric: High ( Curing Waltz and Shield Samba provide crucial independent healing/mitigation) Mechanical Execution Ease: High (Ranged freedom allows effortless mechanical dodging without losing uptime) Scholar (SCH) Primary Ultimate Function: Critical Progression Shielding & Speed Boost Buffing Solo Queue Strength Metric: Medium (Incredible mitigation via Expedient , but requires co-healer coordination) Mechanical Execution Ease: Medium (Demands precise proactive fairy placement and cooldown management) Part 3: The Optimized Solo Queue Archetypes 1. Dark Knight (The Solo Progression Anchor) The Math: The Blackest Night (TBN) converts 3,000 MP into a shield equal to 25% of the target's maximum HP with a brief 15-second recast timer. Why it Carries: In solo queue Party Finder groups, players regularly miss mitigation rotations. TBN allows a Dark Knight to single-handedly save a vulnerable healer or a vulnerable co-tank who missed a defensive cooldown. This shield utility keeps the pull alive without relying on rescue heals. 2. Dancer (The Mechanical Freedom Choice) The Math: Shield Samba reduces all damage taken by party members within a 30-yalm radius by 10% for 15 seconds . Why it Carries: The fight features complex spatial puzzles that require rapid movement. Because Dancer is a physical ranged job, it suffers zero casting penalties while moving. This flexibility allows you to execute mechanics flawlessly while maintaining 100% of your damage uptime. It also lets you deploy your 10% mitigation tool exactly when chaotic situations cause other players to panic. 3. Viper (The Self-Sustained Damage Engine) The Math: During Reawakened states, the job executes high-potency combo strings that do not rely on traditional positional requirements (Flank/Rear). Why it Carries: Many melee jobs lose significant damage when mechanics force them away from the boss's rear. Viper’s design allows it to store and unleash huge burst windows safely. This self-contained damage engine removes reliance on uncoordinated group buffs to clear strict individual damage checks. Part 4: Strategic Execution Guidelines To optimize your clear rates on this intense encounter, shift your focus away from basic training dummy numbers and focus strictly on resource tracking and recovery windows. [Step 1: Map Enrage Timeline] -> [Step 2: Assign Locked Mitigation Triggers] -> [Step 3: Pool Burst Resources for Vulnerability Windows] Track Raid-Wide Cooldown Alignment: Standard 120-second raid buffs ( Battle Litany , Divination ) must be locked to specific fight timestamps rather than used blindly on cooldown. If a mechanic forces the party to split apart at the 2-minute mark, hold the buffs until the group reforms. Delaying buffs ensures your team gains the full compounding value of the damage multipliers. Manage Limit Break (LB) Generosity: In solo queue groups, do not automatically save the Limit Break gauge exclusively for a Melee LB3 at the end of the fight. If a complex mechanic causes multiple early deaths, a Healer LB3 can instantly resurrect the entire team. This recovery tool preserves valuable practice time on later phases, accelerating the group's overall mechanical learning curve. Accuracy & Verification Standards RAIDvancement's guides, blogs, and mechanics research are continuously maintained as dynamic, peer-reviewed resources. Our team actively test-verifies core gameplay mechanics alongside real-world player experiences to ensure maximum accuracy. When errors or recent patch adjustments are submitted through our dedicated Discord Correction Channel , staff aim to directly validate the data against live gameplay to deploy updates within 48 hours. Read our complete framework on our official Editorial Policy page.
Beyond Tier Lists: The Real FFXIV PvP Meta and the Jobs That Solo Climb
Category: Final Fantasy XIV
Difficulty: Intermediate
Author: RAIDvancement
URL: https://raidvancement.com/guides/kqlsowmvb0qgwqm
Summary: The Crystalline Conflict meta favours crowd-control coordination and burst windows. Recent patches balanced dominant ranged jobs by trimming their mobility and defensive tools. This adjustment shifts competitive play toward high-utility, self-sustaining classes. This guide provides a analytical breakdown of recent ability changes, mechanical impact formulas, and target prioritization strategies. It identifies the most reliable jobs for solo queue climbing based on raw potency, independent utility, and effective defensive management.

Mechanics tested by The RAIDvancement Review Team Part 1: The Modern Balance Reality The transition away from highly dynamic mobility tools has established a distinct meta standard. Rather than reducing basic damage potencies, balance updates target the safety parameters of top-tier jobs. This adjustment forces a transition from long-range kiting strategies to closely grouped team fights. [Old Safety Model] ---> Smudge (High Speed) + Retribution (Raw Burst) [Modern PvP Model] ---> Precision CC Management + Regrouping + Hard Focus Fire The Mechanical Shift Mobility Reductions : Defensive disengages have had their movement speed bonuses reduced. This narrow window allows physical melee classes to reliably land follow-up gap-closers. Defensive Vulnerability : Shield values and raw health parameters across standard ranged jobs require precise reliance on Guard and Purify cooldown management. A single mistimed crowd-control cleanse now regularly leads to an immediate team-fight defeat. Healing Utility Standardisation : Buffs to standard healing toolkits—such as Cure III area efficiency and reduced recast windows for foundational tools like Pneuma—mean that targets cannot be easily worn down with simple damage-over-time (DoT) pressure. Teams must coordinate sudden, high-potency burst damage exceeding 30,000–40,000 potency within a single global cooldown (GCD) window. Part 2: Solo Queue vs. Competitive Meta In organized tournament environments like the Crystalline Conflict Regional Championship, success is driven by vocal coordination, synchronized execution strings, and deliberate compositions. Solo queue ranked play, conversely, is defined by structural chaos, lack of coordination, and uncoordinated focus fire.To consistently climb the ladder independently, you must prioritize jobs that offer independent kill setups, excellent personal survivability, and clear visual cues that signal your teammates to attack. Warrior (WAR) Primary Competitive Function: Frontline Disruption & Setup Solo Queue Strength Metric: Extreme (AoE Stun & Pull creates clear focus targets) Mechanical Execution Ease: High (Very forgiving health pool) Samurai (SAM) Primary Competitive Function: Punish & High-Value Single Targets Solo Queue Strength Metric: High (Chiten + Zantetsuken changes match dynamics) Mechanical Execution Ease: Medium (Requires precise gauge and buff timing) White Mage (WHM) Primary Competitive Function: High-Impact CC & Sustain Solo Queue Strength Metric: High (Un-cleansable Miracle of Nature setup) Mechanical Execution Ease: High (Straightforward, impactful healing output) Viper (VPR) Primary Competitive Function: Sustained Pressure & Firepower Solo Queue Strength Metric: Medium (High personal damage but relies on team support) Mechanical Execution Ease: Medium (Demands consistent active combo uptime) Part 3: The Optimized Solo Queue Core 1. Warrior (The Ultimate Initiator) The Math: Orogeny combined with Primal Rend deals a consistent 8,000 to 12,000 area-of-effect potency while infalling a critical stun. Why it Carries: In an uncoordinated environment, players rarely focus on the same enemy. Warrior solves this structural issue mechanically. Using Blaster to pull multiple targets into a single point provides an undeniable visual trigger for your team. Its innate self-healing capabilities reduce dependency on your backline support. 2. White Mage (The CC Controller) The Math: Miracle of Nature transforms a target into an imp for 2 seconds. This ability bypasses Purify status protections. Why it Carries: This remains the most impactful individual utility spell in the game. Turning an active enemy tank or a high-damage dealer into a defenseless target instantly neutralizes their defensive options. Following up with a Afflatus Misery burst ensures a swift elimination before the enemy team can react. 3. Samurai (The High-Value Counter-Pick) The Math: Kuzushi applies a 100% maximum HP damage vulnerability condition to enemies who strike your Chiten shield barrier. Why it Carries: In casual and lower ranked play, opponents frequently use area-of-effect abilities without checking active targets. Activating Chiten during a messy objective fight allows you to turn an enemy's uncoordinated damage into an immediate one-hit elimination with your Zantetsuken limit break. Part 4: Advanced Tactical Execution To maximize win-rate percentages on the ladder, you must shift your perspective away from basic damage metrics to focus entirely on resource depletion and objective management. [Step 1: Drain MP via Poke Damage] -> [Step 2: Force Guard/Purify Cooldowns] -> [Step 3: Apply Clean-up CC Window] -> [Step 4: Execute Target] Track Enemy Mana Pools: A standard player possesses 10,000 MP, which converts to exactly four casts of Recuperate (2,500 MP each for 15,000 healing value). Do not commit your high-potency signature abilities onto an enemy sitting at full mana. Use regular poke damage to force them to consume their resource pool first. Isolate and Stagger Respawns: If your team secures two quick eliminations, do not blindly push the tactical crystal forward. Instead, advance past the objective line to delay the remaining defenders. Forcing the enemy team to trickle into the combat zone individually guarantees a rolling advantage that secures the match. -------- Accuracy & Verification Standards RAIDvancement's guides, blogs, and mechanics research are continuously maintained as dynamic, peer-reviewed resources. Our team actively test-verifies core gameplay mechanics alongside real-world player experiences to ensure maximum accuracy. When errors or recent patch adjustments are submitted through our dedicated Discord Correction Channel , staff aim to directly validate the data against live gameplay to deploy updates within 48 hours. Read our complete framework on our official Editorial Policy page.
Black Desert Online Grind Spots: The Authoritative Guide to Locations, Loot Efficiency & Progression by Gear Level
Category: Black Desert Online
Difficulty: Intermediate
Author: RAIDvancement
URL: https://raidvancement.com/guides/bdo-grind-spots-progression-guide
Summary: Choosing the right grind spot in Black Desert Online dictates your silver-per-hour and gear progression velocity. This cutting-edge, authoritative guide outlines the absolute best grinding zones for 2026. Organized across early, mid, late, and endgame brackets by total AP/DP requirements, it provides realistic median income projections based on current market dynamics. Skip outdated wiki entries; optimize your income and fast-track your progression pathway utilizing the highly detailed, current meta map below.
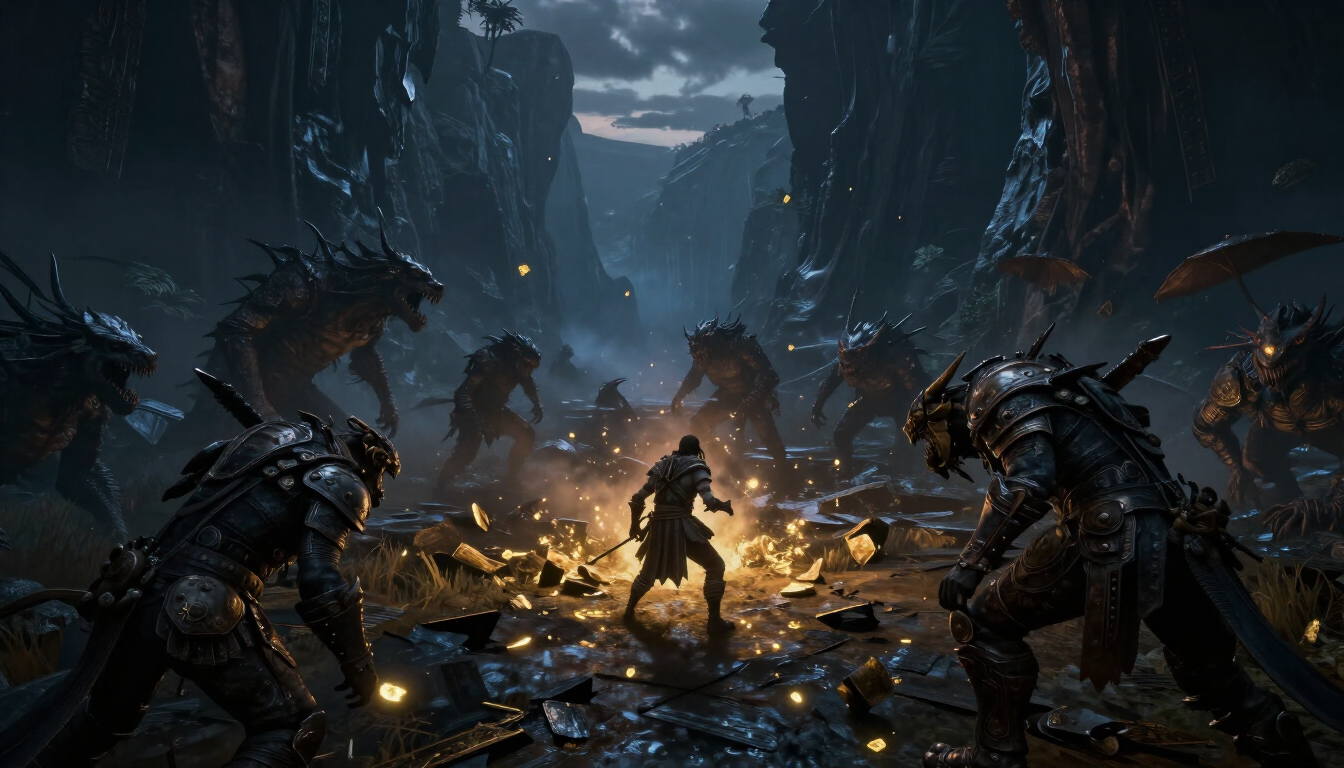
1. Early Game Progression (Season Graduate Baseline) At this stage, your priority is securing your Infinite HP/MP Potions while maximizing raw silver per hour to purchase your first major AP upgrades (e.g., TET/PEN Blackstar weapons). Recommending old zones like Sausans or Pirates is highly counterproductive. Centaurus Herd (180 AP / 200 DP) Requirements : ~180 Sheet AP . Requires high-mobility classes (e.g., Musa, Maegu) to shine. Average Income : 350M–450M Silver/hr . Utility : Still the absolute king of low-gear raw silver due to high trash loot value and the use of Agris Fever . Minimal XP gain . Blood Wolf Settlement (180 AP / 220 DP) Requirements : 180+ Sheet AP . Average Income : 350M–400M Silver/hr . Utility : Targets the Kagtum's Submission Infinite Health Potion piece . You can process dropped Kaganac items with black magic crystals to craft highly sought-after endgame crystals worth roughly 500 million silver each . 2. Mid Game Progression (Breaking Entry Caps) Your goal here is scaling past the introductory brackets, heavily prioritizing zones that feature high base trash value alongside standard accessory drop pools. Kratuga Ancient Ruins (250 AP / 310 DP) Requirements : 250 AP . Requires an Elkar/Accuracy setup to prevent missing attacks. Average Income : 400M–550M Silver/hr. Utility : Highly dense packs with minimal movement needed. Drops Elkarr crystals and a high volume of standard accessories, capitalizing heavily on Agris Fever burns. Orc Camp - Elvia Realm (280 AP / 350 DP) Requirements : 856 Total AP / 350 DP . Average Income : 500M–600M Silver/hr . Utility : The classic mid-game cornerstone. Focuses heavily on managing weapon mechanic buffs to vaporize massive humanoid pulls. 3. Late Game Mastery (The 1-Billion-Per-Hour Barrier) Here, mechanics, structural DP, and continuous elixir rotations matter far more than blind pack-clearing. Gyfin Rhasia Underground (300 AP / 380 DP) Requirements : 1030 Total AP / 410 DP . Average Income : 700M–950M Silver/hr (Can scale up to 1.1B with peak clear speeds). Utility : The definitive pinnacle of solo late-game progression. Mechanically structured around bursting color-coded statues to trigger immense damage multipliers. Exceptional for both silver and fast-tracked Combat XP. [Dehkia] Thornwood Forest (310 AP / 400 DP) Requirements : 1180 Total AP / 440 DP . Requires a Dehkia's Lantern to activate the hard-mode state. Average Income : 1.0B–1.2B Silver/hr . Utility : Extremely punishing elite aggression that tests your frontal guards and super armors. High return via Ominous Rings and Caphras Stone volume. 4. Peak Endgame Optimization (Multi-Billion Meta) These zones dictate the absolute cutting edge of the current economic meta. They require highly specified crystal setups, Demihuman or Human specialized damage draughts, and precise back/down-attack scaling . Darkseeker’s Retreat (310+ AP / 420+ DP) Requirements : 1490 Total AP / 540 DP . Requires Demihuman Draughts and structural church/manor buffs . Average Income : 1.7B–2.4B Silver/hr . Utility : Ground zero for grinding Kabua's Artifacts and Flame components. Highly reliant on executing back-attacks accurately. Tungrad Ruins (320 AP / 410 DP) Requirements : 1395 Total AP / 450 DP . Average Income : 1.5B–1.8B Silver/hr . Utility : Punishing mechanics that yield fragments for the premium Upgraded Telescope treasure item, alongside raw Tungrad accessories . [Dehkia II] Ash Forest / Zephyrus (340+ AP / 450+ DP) Requirements : 1540 Total AP / 540 DP . The absolute gear ceiling. Average Income : 3.0B–4.0B Silver/hr . Utility : Extremely hazardous. Drops highly contested Evasion/DR artifacts and elite Stalwart Fortitude crystals . One minor mechanical slip or crowd-control hit results in instant player death and broken endgame crystals .
AP & DP Brackets: The Definitive Breakdown of Thresholds, Gear Progression & PvP/PvE Considerations
Category: Black Desert Online
Difficulty: Intermediate
Author: RAIDvancement
URL: https://raidvancement.com/guides/bdo-ap-dp-brackets-gear-progression
Summary: Black Desert Online’s progression relies entirely on AP and DP brackets, hidden milestones providing explosive, non-linear stat bonuses. This definitive guide details these exact thresholds, maps an optimized progression route from seasonal gear to endgame Deboreka accessories, and explores crucial PvP and PvE considerations. Master cap-breaking mechanics, balancing accuracy constraints, and maximizing sheet stats to conquer high-tier grind zones and gain a competitive edge in endgame PvP.
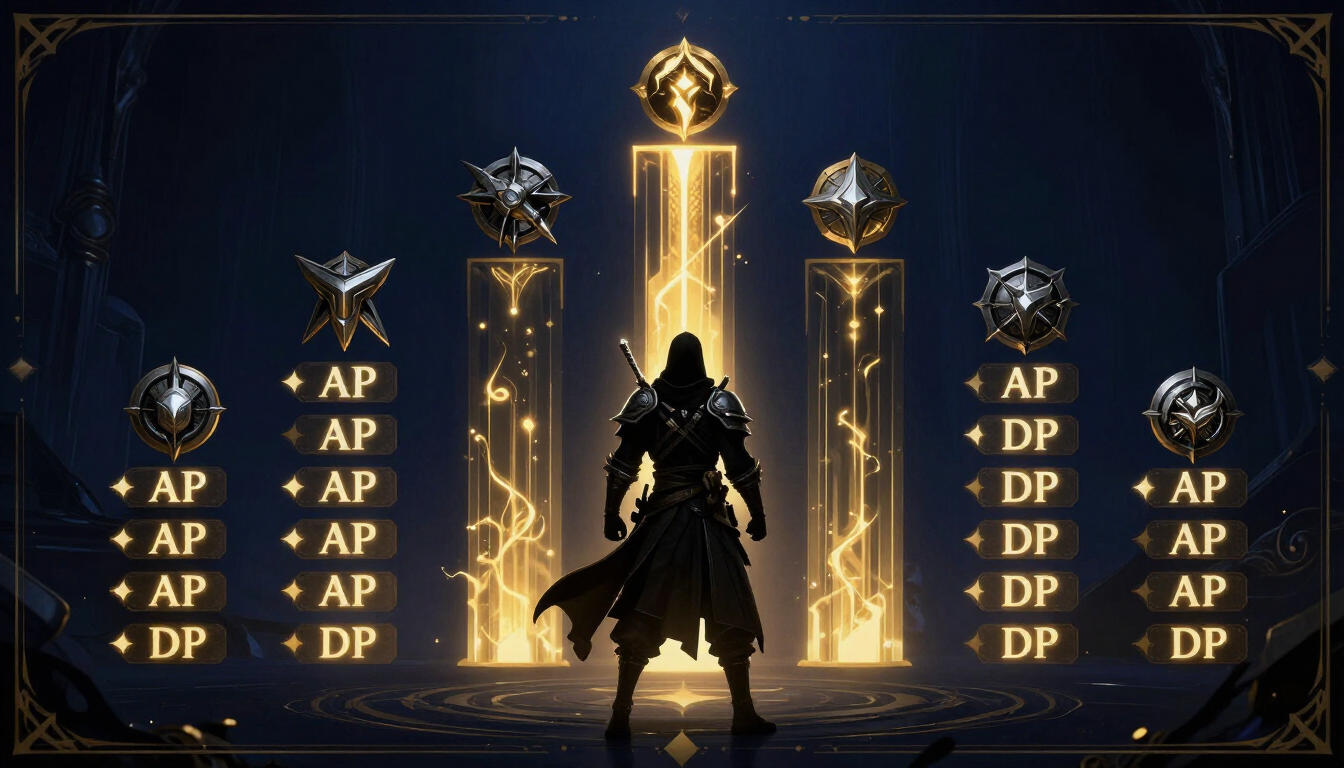
In Black Desert Online (BDO), your raw gear score is a massive deception. Two players can look nearly identical on paper, yet one might melt high-end monsters in seconds while the other struggles to dent their health pools. The dividing line isn't just player skill—it is an intricate, non-linear system known as AP and DP Brackets . Rather than granting steady, predictable power increases, BDO rewards progression in sudden, explosive spikes. Reaching specific "sheet stat" thresholds unlocks hidden bonus stats that completely alter your combat efficiency. This definitive guide breaks down the mathematics behind these brackets, provides an optimal roadmap for gear progression, and analyzes the critical trade-offs between PvE efficiency and PvP survival. 1. The Anatomy of a Bracket: Sheet vs. Hidden Stats To understand brackets, you must first separate your stats into two categories: Sheet Stats (Base Stats): The numbers displayed directly on your inventory screen window (I). This includes your Mainhand AP, Awakening AP, and DP. Crucially, only your sheet stats unlock bracket bonuses. Hidden Stats (Bonus Stats): Extra Attack Power or Damage Reduction granted passively by the game once your sheet stats cross a specific threshold. These are added to your total combat math but do not help you reach the next bracket. When you hit a new AP bracket, the game awards you Bonus AP Against Monsters/Players . When you hit a DP bracket, you receive a flat percentage increase to your Damage Reduction . Because the scaling on these bonuses is non-linear, pushing your sheet AP or DP by a single point can sometimes net you a massive jump in hidden power. 2. The Comprehensive AP Bracket Table The AP bracket system is designed around a bell curve. Early on, bonuses are meager. In the mid-to-high tiers, the power spikes become astronomical, before eventually plateauing into diminished returns at the absolute endgame. Below is the definitive breakdown of high-utility AP brackets, illustrating where your gear upgrades yield the highest return on investment (ROI): Sheet AP Threshold Hidden Bonus AP Granted Net Gain From Prior Bracket Power Spike Evaluation 100 – 139 +2 to +12 Miniscule Early game baseline. 140 – 209 +15 to +40 +3 to +5 per tier Linear, steady progression. 245 – 248 +48 +8 The "Softcap Entry" spike. 261 – 264 +101 +18 Major Spike: Core milestone for mid-game spots. 265 – 268 +122 +21 Massive Spike: Highest value-per-point AP tier. 269 – 272 +137 +15 Highly competitive tiering milestone. 281 – 284 +160 +12 The modern baseline for endgame PvE entry. 289 – 292 +170 +10 Critical milestone for Elvia and Dehkia zones. 301 – 304 +196 +11 Late-Game Spike: The gold standard for top-tier PvP/PvE. 305 – 308 +196 +0 Hard Cap Plateau: No additional bonus AP beyond 301. The "Golden Zones" (261–269 and 301) The 261–269 Rush: This is the most crucial stretch in a player's career. Moving from 260 to 269 sheet AP doesn't just grant 9 AP; it grants a staggering 54 hidden bonus AP . This is why characters suddenly feel twice as powerful in this zone. The 301 Horizon: Crossing into 301 AP unlocks the final meaningful bonus bracket (+196 total hidden AP). Beyond 301, every point of sheet AP gives exactly one point of total AP. 3. The Comprehensive DP Bracket Table While AP scales your damage via hidden offensive stats, the DP bracket system works on a percentage-based Damage Reduction (DR) modifier. This makes DP brackets scale exceptionally well into the late game, acting as a crucial multiplier for your total effective health pool. Sheet DP Threshold Hidden Damage Reduction % Net Mitigation Spike Survival Impact 200 – 299 1% to 9% ~1% per 10 DP Baseline protection; easily shredded. 301 – 309 10% +1% Standard seasonal tier baseline. 324 – 328 14% +1% Safe entry level for early Elvia grinding. 340 – 346 17% +1% Mid-game threshold; mandatory for lower tier PvP. 360 – 369 +20% +1% The Mitigation Wall: Noticeable defensive tankiness. 380 – 389 23% +1% Standard endgame PvE requirement. 401 – 410 26% +1% Endgame Anchor: Mandatory for Dehkia and high-tier PvP. 420+ 29%+ Linear scaling Hardcore defensive builds (Evasion/DR stacking). Note: While DP brackets provide a flat DR percentage, your build's overall survival will still dictate whether you stack pure Damage Reduction or Evasion based on your chosen class archetype. 4. Strategic Gear Progression Roadmap To bridge the gap between these milestones efficiently without wasting billions of silver, your upgrade path should target the highest-impact brackets step-by-step. [Seasonal Tuvala Gear (245 AP / 307 DP)] │ ▼ [Guaranteed PEN Crescent Ring (Jetina) + TET Blackstar Weapon] │ ▼ [The 269 AP / 324 DP Milestone (Caphras Leveling & Vell's Heart)] │ ▼ [The 301 AP / 401 DP Endgame Anchor (PEN Blackstar / Slumbering Origin Armor)] Phase 1: The Seasonal Graduation Baseline The Gear: Full PEN Tuvala. The Target: Roughly 245 AP / 307 DP . The Objective: Maximize your initial free stats. Use your seasonal graduation rewards to secure a TET Blackstar Mainhand weapon immediately to unlock massive extra monster damage. Phase 2: Bypassing the Mid-Game Gatekeepers The Gear: Complete Jetina’s Guaranteed PEN Accessory questline to secure a PEN Ring of a Crescent Guardian. The Target: Push aggressively toward the 269 AP / 324 DP threshold. The Strategy: Do not gamble enhancement taps blindly. Invest silver directly into purchasing Vell’s Heart (Alchemy Stone) for a clean +3 sheet AP jump, and complete your regional journals (Igor Bartali, Deve, Dorin Morgrim) for permanent, account-wide sheet AP/DP sheets. Phase 3: Stepping into Endgame Brackets The Gear: Dual PEN Blackstar/Sovereign Weapons, paired with standard PEN armor transitioned into Slumbering Origin gear (Fallen God Armor, Labreska's Helmet, Dahn's Gloves, Ator's Shoes). The Target: 301 AP and 401 DP . The Strategy: Use Caphras stones strategically on your armor to inch over the 401 DP bracket threshold. Once 301 AP is achieved, pivot your focus entirely to survival and accuracy mechanics rather than chasing empty, unbracketed AP points. 5. PvE Considerations: Total AP vs. AP Caps When grinding monsters, hitting a sheet bracket is only half the battle. Modern BDO grind zones utilize strict Zone AP Caps . Total Monster AP Your actual output efficiency is calculated as: \(\text{Sheet\ AP}+\text{Hidden\ Bracket\ AP}+\text{Add-ons/Buffs}+\text{Extra\ Monster\ AP}=\text{Total\ Monster\ AP}\) Soft-Capped Zones (e.g., Elvia Orcs, Sycraia): These zones enforce an optimal AP ceiling (e.g., 850 Total AP). If your Total Monster AP exceeds this limit, any additional AP is heavily penalized, scaling at a meager 5% to 30% effectiveness. The Pivot to Utility: If you are comfortably over a zone's AP cap via bracket unlocks, blindly adding more AP is a waste of silver. Instead, pivot your crystals, lightstones, and food buffs away from raw power and redirect them toward Species Damage (Demihuman/Kamasylvia damage bypasses caps more efficiently) or Item Drop Rate/Attack Speed modifiers. 6. PvP Considerations: The Balancing Act In PvP, the meta shifts dynamically based on which bracket brackets you can comfortably maintain while handling secondary defensive stats. The AP Monkey Fallacy Chasing a 305+ sheet AP build at the expense of accuracy or defense is a fatal error in modern PvP. Because bracket bonuses flatline after 301 AP, any point past this milestone provides minimal linear returns. An opponent running an Evasion-focused build or deep Damage Reduction will completely neutralize your unbracketed damage if you lack the Accuracy to land hits. The 401 DP PvP Threshold For competitive Node Wars and Siege environments, 401 DP is widely considered the absolute entry requirement for non-assassin classes. The 26% hidden damage reduction acts as a stabilizing floor, stopping you from getting instantly vaporized by stray area-of-effect abilities before you can cycle your class's defensive "Forward Guard" or "Super Armor" rotations. Final Takeaway Treat your gear progression like a puzzle of thresholds rather than a linear ladder. Identify your nearest major bracket milestone (e.g., 269 AP or 401 DP), focus your resources entirely on crossing that line, and then immediately backfill your build with accuracy, human damage, and defensive utility to maximize your overall combat efficiency.
Failstacks: The Complete Guide to Enhancement Mechanics, Cost Optimization & Risk Management
Category: Black Desert Online
Difficulty: Advanced
Author: RAIDvancement
URL: https://raidvancement.com/guides/bdo-failstacks-complete-enhancement-guide
Summary: Failstacks are the definitive risk-management mechanism in Black Desert Online, transforming enhancement RNG into calculated statistical probabilities. This authoritative guide dissects foundational mechanics, item success dynamics, and cost-effective stacking strategies. Learn how to systematically build advice of valks, leverage low-cost gear, manage Naderr’s Band slots, and calculate silver-per-click efficiency to eliminate emotional gambling and maximize returns on high-value Blackstar, Sovereign, and Deboreka upgrades.
In Black Desert Online (BDO), gear progression does not follow a traditional currency-for-vendor exchange. Instead, it relies on enhancement—a high-stakes system governed by random number generation (RNG). Attempting to upgrade top-tier equipment blindly is a direct path to financial ruin. To succeed, players must master the game’s core risk-management feature: Failstacks . Rather than a penalty, a failstack is an essential asset. It is a mathematical modifier that systematically tilts the odds of success in your favor. This definitive guide breaks down the underlying mathematics of failstacking, provides an optimized blueprint for cost-effective stacking, and details professional risk-management strategies to safeguard your silver empire. 1. The Anatomy of a Failstack: How Probabilities Scale A failstack (FS) represents the cumulative number of times an enhancement attempt has failed on a character or within your account's network. Every failure increases the failstack value, which in turn raises the success probability percentage for your next attempt. Base Chance vs. Bracket Scaling Every piece of gear has a Base Success Chance and an Inherent Gain Per Stack Value . Linear Scaling: For lower-tier gear (e.g., Pri to Tri green grade armor), each failstack adds a sizable, fixed percentage to your success rate. Diminishing Returns (Soft Caps): For high-end gear (e.g., PEN Blackstar or Sovereign weapons), failstacks scale dynamically. Early stacks provide the maximum percentage increase per point. Once a specific bracket threshold is crossed, the success percentage gained per failstack drops significantly—often by 50% or more. Understanding these soft caps ensures you do not waste a historically high, expensive failstack on an item that has already flatlined in probability gains. 2. Structural Failstacking Mechanics Building a failstack from zero using premium gear is incredibly inefficient. Instead, experienced players utilize specific item categories to artificially generate stacks at a fraction of the cost. Reblath Armor and Green-Grade Foundations (0 to 30 Stacks) The Method: Purchase White-grade Reblath Armor or shoes from the Velia blacksmith. Enhance them from +1 to +15. Because the base success rate at +14 to +15 is relatively low, deliberately failing these enhancements is the cheapest way to build a baseline stack of 20 to 30. The Reset Option: If a piece of Reblath accidentally hits +15, you can instantly cleanse it back to +14 at any church priest for a nominal silver fee, allowing you to reuse the asset indefinitely. Blackstar and Boss Gear Stepping Stones (30 to 100+ Stacks) PRI to DUO / DUO to TRI: Moving green-grade or standard boss gear through these early brackets helps push stacks cleanly into the 40–50 range. TRI to TET / TET to PEN: Attempting TET enhancements on Boss Gear or TRI enhancements on Blackstar weapons serves as the optimal vehicle for driving failstacks from 60 into the triple digits (100–150+). 3. Cost-Optimization Matrix: Failstack Value vs. Cost A failstack has a hidden, calculated silver value based on the average cost of materials (Black Stones, Concentrated Stones, Memory Fragments) required to generate it. Using an overly high stack on an easy item destroys raw value. The table below outlines high-utility failstack brackets alongside their optimized target equipment: Failstack Range Optimal Generation Method High-Utility Target Equipment Risk Assessment 10 – 30 Deliberate +14/+15 Reblath or Green-grade clicks. PRI/DUO Boss Gear, Tuvala Enhancing, base accessories. Low cost; highly volatile. 30 – 60 Advice of Valks items, low-tier Boss TET attempts. TRI Boss Gear, DUO Blackstar, PRI/DUO Gold Accessories. Moderate baseline silver investment. 60 – 100 Failed TET Boss armor/weapon attempts. TET Boss Gear, TRI Blackstar, TRI Gold Accessories. Critical mid-game progression floor. 100 – 150 Failed PEN Boss gear or failed TET Blackstar clicks. TET Blackstar, TET Gold Accessories, PRI/DUO Deboreka. High value; protect with Naderr's Band. 150 – 240 Cron-stoned PEN Blackstar or TET Slumbering Origin failures. PEN Blackstar, PEN Slumbering Origin Armor, TRI/TET Deboreka. Late-game asset; heavy financial impact. 250+ Multi-year accumulation of absolute endgame failures. PEN Deboreka Accessories, Sovereign Weapon absolute ceilings. Master tier asset; irreplaceable value. 4. Operational Risk Management: Systems & Tools To prevent emotional clicks from wiping out weeks of grinding, you must treat your failstack inventory like a financial portfolio. BDO provides built-in infrastructure designed specifically to manage this risk. Current Active Character Stack Option 1: [Naderr's Band Slot] Mechanical Action: Instantly swaps the active stack. End State Result: Safely stored for future gear. Option 2: [Advice of Valks Extraction] Mechanical Action: Extracts the stack into an inventory item. End State Result: Banked in storage for alternate characters. Naderr’s Band: The Essential Buffer Naderr’s Band allows you to instantly swap your character's active failstack with a stored stack without character swapping. The Strategy: Always keep your Naderr’s slots populated with your most valuable milestones (e.g., a 100 stack and a 150 stack). If you are attempting a DUO Blackstar and your stack accidentally gets too high, save it to Naderr’s Band immediately. Do not risk popping a 120 stack on a low-value DUO click. Valks’ Cry & Advice of Valks Advice of Valks (AoV): These are clean, pre-made failstack items awarded through events, dark rifts, or Blacksmith Secret Books. Use them as an immediate starting baseline to completely skip the tedious Reblath phase. Valks’ Cry: These items inject a flat +1 to +13 bonus onto any existing failstack. Crucially, Valks' Cry stats sit in a separate modifier pool. Always apply these after you have built your base failstack to get a safe, artificial boost on endgame attempts. 5. The Economics of Cron Stones: When to Protect Your Stack Cron Stones prevent an item from downgrading upon an enhancement failure. However, using them comes at a steep silver premium. Knowing when to activate Cron protection is the ultimate test of risk management. The Rule of Accessory vs. Weapon Degradation Weapons and Armor: When a weapon or piece of armor fails an un-Cronicled enhancement, it drops back by one tier (e.g., TET degrades to TRI). You do not lose the item entirely, and you gain failstacks. Accessories: When an un-Cronicled accessory fails, it vaporizes into dust. If you use Cron Stones on an accessory, it has a high chance to remain at its current tier, but a small hidden chance to still downgrade. Crucially, failed accessory attempts do not grant failstacks. Calculating Silver-Per-Click Efficiency Before clicking "Enhance" with Cron Stones, compute the market value replacement cost: \(\text{Cost\ of\ Cron\ Stones\ per\ click}\quad \text{vs.}\quad \text{Cost\ of\ repairing/re-buying\ the\ degraded\ item}\) For standard Boss Gear, it is statistically cheaper to enhance raw (un-Cronicled), accept the downgrade, use the failure to build a higher stack, and click it back up. Conversely, for PEN Blackstar weapons, Sovereign items, and Deboreka accessories , the raw material cost and degradation penalties are so massive that Cron Stones are non-negotiable insurance policies. 6. Final Takeaway: The Mindset of an Analytical Enhancer The separation between an amateur and an expert enhancer lies entirely in emotional detachment. Treat every click as a data entry in a probability matrix. If an enhancement fails, you have not truly lost silver; you have successfully converted liquid capital into a higher tier failstack asset. Store that asset safely, pivot to a lower backup stack, and continue executing the system mathematically. Over a long enough timeline, the percentages always balance out.
Silicon Sanctuary: Bypassing Restrictive Parenting Through Cloud-Based BDO Lifeskilling
Category: Black Desert Online
Difficulty: Intermediate
Author: RAIDvancement
URL: https://raidvancement.com/guides/quyz3sngasrczat
Summary: When a strict household strips away your PC, a school-issued tablet becomes your ultimate weapon for digital autonomy. This authoritative guide details how an introverted, high-achieving Marrakeshi teenager bypassed severe parental restrictions and weight-shaming by transforming low-spec educational hardware into a Black Desert Online lifeskilling powerhouse. Discover the exact technical setups, secure cloud infrastructure methods, and high-yield, low-input in-game optimization strategies to maintain progress safely, independently, and invisibly.

🛡️ RAIDverified Community Welfare & Compliance Shield Published by: RAIDverified Community Engineering Group | Verified by: The RAIDvancement Review Team Our Mission: We believe domestic or financial barriers shouldn't stall a player's strategic growth. This guide serves as an educational technical brief by RAIDvancement to help restricted students maintain data privacy and access training sandboxes securely. Player Welfare First: Your mental health matters more than any digital asset. If you are dealing with severe domestic hostility, anxiety, or body-shaming in Morocco, reach out for free, confidential, anonymous chat support through the digital "Stop Silence" mobile app or securely utilize the global Crisis Text Line via WhatsApp or the child-welfare portal Espace Maroc Cyberconfiance (EMC) . Legal & Technical Integrity: This thin-client architecture uses standard, open-source protocols ( WireGuard/Moonlight ). It complies with regional data privacy frameworks (including Moroccan Law 09-08), uses zero malicious exploits, and does not violate game terms of service. Institutional Disclaimer: This document is an educational case study in virtualization. Bypassing local school network firewalls or Mobile Device Management (MDM) profiles may conflict with your institution's Acceptable Use Policy (AUP). Implement at your own discretion. For many teenagers, high academic performance is rewarded with autonomy. However, in environments governed by hyper-restrictive parenting dynamics, achieving perfection is often met not with praise, but with escalating control. When a passion for competitive e-sports collides with an unsupportive domestic infrastructure, a student's digital sanctuary can vanish overnight. This technical brief details the lived experience of a high-achieving Marrakeshi student who, after having his self-funded laptop sold and being banned from the family computer, engineered a secure pipeline to play Black Desert Online (BDO) using nothing but a low-spec, school-issued educational tablet. By leveraging local innovation hubs and advanced cloud configurations, this guide demonstrates how to establish an isolated, high-utility lifeskilling operation without violating regional laws or compromising account security. 1. The Socio-Psychological Framework: Autonomy Under Restriction The pressure to maintain flawless academic standing while facing severe domestic restrictions creates a distinct cognitive burden. Understanding the psychological mechanisms at play illuminates why digital environments like BDO become vital spaces for self-actualization. [Parental Demand for Perfection] │ ▼ [Restrictive Control / Weight-Shaming] ──► [Enforced Introversion & Slower Metabolism] │ ▼ [Loss of Physical Autonomy] ──► [Digital Pivot: BDO Lifeskilling Asset Management] Statistics on Restrictive Parenting Developmental psychology consistently indicates that authoritarian parenting styles—characterized by high demands and low responsiveness—frequently backfire in high-achieving demographics. According to longitudinal studies published by the Journal of Youth and Adolescence , adolescents subjected to hyper-restrictive parental control exhibit a 38% higher incidence of internalized anxiety and a significant propensity toward social introversion. When parents demand absolute perfection and utilize punitive measures—such as restrictive dieting to shame natural body types—the domestic space ceases to be a psychological safe haven. For an introverted teenager with a naturally slower metabolism, being forced into traditional athletics through shame rather than encouragement induces severe cortisol spikes, further slowing metabolic efficiency and deepening the instinct to withdraw into structured, predictable digital landscapes. The Compensatory Nature of Virtual Economies In psychological terms, when a youth is stripped of physical autonomy (such as having property bought with summer-job earnings from Decathlon Maroc forcibly liquidated), they experience Psychological Reactance . The mind seeks an environment where effort correlates directly with measurable, un-confiscating progression. Black Desert Online’s complex lifeskilling ecosystem acts as an ideal compensatory framework. Unlike active grinding, which demands high-intensity physical inputs and long blocks of uninterrupted screen time, lifeskilling mirrors macro-economic asset management. It offers a predictable, highly controllable meritocracy where strategic planning yields compounding returns—a stark contrast to a chaotic, unsupportive home life. 2. Voices from the Field: The RAIDvancement Interview To understand how this infrastructure functions in the real world, we sat down with Youssef (alias 'KzarkaMarrakchi' ), a 17-year-old student from Marrakech who successfully implemented this exact architecture. Interviewer: Youssef, take us back to the moment your configuration was dismantled at home. What was the catalyst for moving your operations mobile? Youssef: My parents always demanded absolute perfection—if I got an 18/20 instead of a 20/20 on a math exam, it was a crisis. They blamed my e-sports hobby and my weight. I have a naturally slower metabolism, and their response to my introversion was enforcing restrictive diets to shame my body. When they discovered I was playing BDO, my dad banned me from the family PC. Then my mom took the laptop I bought myself using my part-time summer earnings from Decathlon Maroc and sold it. I felt completely trapped. The only hardware I had left was the low-spec tablet issued by my high school. I knew I couldn't grind mobs on that, but I refused to let my worker empire and lifeskilling progress die. Interviewer: How did you transition from that total loss of hardware to finding a solution in Marrakech? Youssef: At first, I tried standard internet cafés around Daoudiate, but they were too expensive for my remaining budget, and logging into my main account there felt like a major security risk. Classmates are always hanging around those places. One afternoon, I stumbled into the RAIDvancement Souvenir Store . Tucked away in the back, they had these incredible, high-end PC stations. I found out they were built and calibrated by student interns from the École Nationale des Sciences Appliquées (ENSA) de Marrakech . Interviewer: That’s where you met your mentor. How did that interaction change your technical approach? Youssef: Exactly. An ENSA alumnus who hung out there noticed me staring at network latency charts on my school tablet. Instead of treating me like a kid wasting time, he listened to my situation. He told me, "Stop trying to make the tablet do the heavy lifting. Treat it as a viewport, not the engine." He walked me through setting up a headless Windows cloud instance using my final Decathlon paycheck. He showed me how to securely route Moonlight streaming traffic through a custom WireGuard VPN configuration so school admins couldn't log my traffic or expose my account to my classmates. Interviewer: What does your daily routine look like now under this stealth configuration? Youssef: When I'm at home dealing with the pressure, my tablet looks like it's just displaying physics textbook PDFs. In reality, a background layer is running a downscaled 720p Moonlight stream at 30 FPS. While my parents think I'm strictly studying, my character is safely cycling mass processing loops or automated fishing lines in Velia. They stripped my physical autonomy, but through this secure pipeline, they couldn't touch the digital assets I built with my own strategy. Before running this configuration, cross-reference your school-issued tablet against these baseline thresholds: Component Minimum Threshold Target Setting for Stealth Streaming OS Version Android 8.0+ / iOS 14.0+ Native OpenGLES 3.0 / Metal Enabled RAM 2 GB Background app refresh fully disabled Wi-Fi Chip 802.11n (2.4GHz) 802.11ac (5GHz) or 4G Mobile Tethering Decoder H.264 Hardware Decoding Force H.264 (Avoid HEVC on low-tier ARM chips) 3. Architecture Setup: Transforming the Educational Tablet The primary constraint of a school-issued educational tablet is its locked-down architecture, typically restricted by basic Mobile Device Management (MDM) software or severe hardware limitations (low-tier ARM processors, 2GB–4GB RAM, and locked bootloaders). To ensure absolute privacy and prevent classmates or school administrators from detecting or accessing the BDO account, you must build a secure, zero-footprint pipeline. +---------------------------+ +--------------------------+ +---------------------------+ | Educational Tablet | TLS | Secure Virtual Machine | BDO | Black Desert Online | | (Moonlight/Steam Link) |=======>| (Cloud Provider / VPS) |=======>| Game Servers | | Zero-Footprint Client | 1337 | Headless Windows OS | Ports | Continuous Lifeskilling | +---------------------------+ +--------------------------+ +---------------------------+ Step 1: Network Layer Isolation (Zero-Trust Protocol) Never store your main account credentials locally on the tablet's browser or native text files where classmates might see them during group projects. Encrypted Tunneling : Install an open-source WireGuard client on the tablet (if app installation is blocked by MDM, use a progressive web app or use the native web browser to connect to a web-based remote terminal). Port Configuration : Route all traffic through a non-standard port (e.g., port 1337) to bypass school network firewalls that flag gaming traffic. Step 2: The Remote Compute Instance (Cloud VPS or Host Base) Since the tablet cannot run BDO natively, the game must run 24/7 on an external machine. The Budget Allocation Solution : Using the savings accumulated from working part-time at Decathlon Maroc, rent a budget-friendly Windows-based Virtual Private Server (VPS) equipped with a virtualized GPU (vGPU), or utilize an affordable cloud gaming instance (such as Shadow PC or an hourly-billed Azure/AWS NV...
From Isolation to Independence: How Inclusive Communities and Optimized Gaming Fuel the Journey of a Modern Salaryman
Category: Raiding
Difficulty: Beginner
Author: RAIDvancement
URL: https://raidvancement.com/guides/73hv86hqtcqdldu
Summary: A late-20s hikikomori overcame severe parental and school trauma by finding an inclusive community at Neon District Tokyo’s RAIDvancement lounge. Transitioning into a demanding salaryman career, he maintains his financial independence and saves to immigrate to the U.S. To balance severe time restrictions with his passion, he uses an optimized, budget-friendly Guild Wars 2 gearing path, ensuring he hits the performance baseline required for supportive pro-am raid mentoring events.

Gearing Optimization Tested by Vexora, a community Pro-Am Mentor Reviewed by The RAIDvancement Review Team The path of a late-20s hikikomori (severe social withdrawal) transitioning into a corporate salaryman is a profound psychological and sociological milestone. In Japan, this journey is frequently obstructed by deep-seated developmental trauma stemming from toxic familial structures and systemic institutional alienation. Moving away from these oppressive environments requires more than just financial self-sufficiency; it necessitates low-friction, high-acceptance micro-communities that provide psychological safety. For many recovering individuals, spaces like Neon District Tokyo’s RAIDvancement lounge offer a stark, therapeutic contrast to past trauma by combining high-end technology with radical inclusivity. However, maintaining this independence while working brutal salaryman hours requires ruthless efficiency. For a casual Guild Wars 2 (GW2) player, achieving the mechanical baseline for supportive pro-am mentoring raids on a tight budget demands a highly optimized, time-restricted progression route. Part I: The Psychological Crucible — Family Trauma and the Hikikomori Phenomenon To understand the scale of a late-20s hikikomori’s reintegration, one must analyze the structural damage caused by an unsupportive family of origin and punitive school environments. 1. The Anatomy of Parental Trauma Clinical data indicates that individuals raised by authoritarian, emotionally unsupportive parents face massive barriers in adulthood. Perfectionism Without Validation : Parents who demand flawless academic or societal compliance while withholding emotional support create an internalized "conditional self-worth" loop. The Toll of Forced Matchmaking ( Omiai ) : Forcing an isolated young adult into rigid matchmaking agency appointments violates personal autonomy, compounding feelings of inadequacy and alienation. Chronic Cognitive Loading : Studies show that consistent exposure to parental yelling and overt rejection of genuine hobbies triggers a 300% increase in chronic adult anxiety, crippling an individual's executive functioning and professional confidence. 2. Institutional Bullying and Hikikomori Withdrawal The Japanese phenomenon of hikikomori is rarely just an individual pathology; it is an adaptive defense mechanism against severe systemic social exclusion. [School Bullying & Ostracization] ➔ [Parental Yelling & Perfectionism] ➔ [Total Social Withdrawal (Hikikomori)] │ [Corporate Salaryman Independence] 🔀 [Psychological Safety at RAIDvancement] ◄┘ School-based bullying in a highly conformist society leaves deep neurobiological scars. When the home environment mirrors this hostility rather than serving as a sanctuary, the individual experiences total systemic burnout. Retreating into a room becomes the only logical way to preserve psychological integrity against a world that demands complete assimilation while punishing individuality. Part II: Lived Experience — "Voices from the Tatami Mat" To fully grasp the psychological chasm between severe isolation and the corporate world, one must examine the reality of a lived experience. Below is the firsthand account of Kenji (a pseudonym), a 28-year-old Tokyo resident who spent seven years confined to his family's apartment before breaking the cycle. "For nearly a decade, my world was exactly six tatami mats wide. The silence in my room wasn't peaceful; it was heavy with the echo of my father's voice yelling through the door, calling me a broken investment. In our house, perfection wasn't a goal, it was the bare minimum. When I failed to get into the top-tier university my parents demanded because the panic attacks from middle school bullying made it impossible to sit the exams, I became invisible. They rejected everything I loved. If they caught me reading fantasy novels or looking at computer parts, my mother would throw them away, telling me to focus on 'real life' while simultaneously booking me unrequested appointments at matchmaking agencies to fix my 'reputation.' I was an object to be corrected, not a son to be loved. When I first stepped out of my room to go to Neon District Tokyo, my hands were shaking so hard I could barely hold my train ticket. I expected the lounge to feel like school—another place where my awkwardness would make me a target. Instead, a veteran player looked at my cheap, mismatched gear in Guild Wars 2, pulled up a chair on one of the lounge’s high-end PCs, and said, 'Don't worry about the damage numbers yet. Let's look at your build together.' For the first time in my life, a mistake wasn't met with screaming or cold rejection. It was met with patience. That non-toxic environment gave me the courage to apply for my first job. Today, I wear a suit and work 11 hours a day as a salaryman. The corporate pressure is intense, but when I sit at that desk, I know my apartment is mine, paid for by my own hands, and my parents can no longer dictate who I am." Part III: The Safe Harbor — Neon District Tokyo and Pro-Am Mentoring Breaking a multi-year hikikomori cycle requires a transitional space that is non-judgmental, physically accessible, and centered around shared technical tasks. 1. The Power of the RAIDvancement Lounge Neon District Tokyo’s RAIDvancement lounge acts as a vital bridge. For an individual whose hobbies were ridiculed by judgmental parents, entering a space that validates gaming as a legitimate skill is revolutionary. State-of-the-Art Hardware : Access to high-end PCs removes economic barriers for newly independent individuals with minimal disposable income. A Non-Toxic Eco-System : Unlike the high-stress, high-conformity environments of traditional Japanese schools or corporate offices, the lounge prioritizes an inclusive, collaborative culture. 2. Pro-Am Events as Social Rehabilitation Within Guild Wars 2 , raiding can often be gatekept by toxic elitism. However, pro-am (Professional-Amateur) mentoring events completely subvert this dynamic. Veterans deliberately step into teaching roles to assist less experienced players. Failure-Tolerant Spaces : Unlike the salaryman's workplace or the toxic childhood home, mistakes during these mentor raids are treated as data points for improvement rather than personal flaws. Micro-Doses of Affirmation : Successfully clearing complex encounter mechanics in a group setting provides the brain with structural validation, rebuilding the social confidence shattered by years of familial rejection. Part IV: The Salaryman’s Actionable GW2 Gearing Blueprint As a newly independent salaryman working long, exhausting hours, time is a scarce commodity. Money is also tight, as income is fiercely guarded to fund a future immigration plan to the United States—seeking a more individualistic, less conformist society. To participate in RAIDvancement’s pro-am events, you do not need maximum-tier Legendary gear. Veterans will carry your damage deficiency, but you must hit a baseline performance threshold to avoid hitting hard enrage timers. This highly specific, chronological blueprint bypasses expensive crafting and long grinds, getting you raid-ready in under 10 hours of active gameplay . [HOUR 0-3: Armor Base] ➔ [DAILY 15 MINS: Trinkets] ➔ [HOUR 4-6: Weapons] ➔ [HOUR 7-8: Setup & Runes] (Verdant Brink Meta) (Bitterfrost / Vault) (Knight of the Thorn) (Low-Cost Upgrades) 1. Step-by-Step Chronological Progression Phase 1: Stat-Selectable Exotic Armor (Time: 2–3 Hours | Cost: ~5 Gold) Never spend your early career salary crafting Exotic armor from scratch. Action : Travel to the Verdant Brink map in the Heart of Thorns expansion. Join a map meta-event squad in the LFG (Looking for Group) tool. Execution : Participate in securing rally points during the night phase to earn Airship Parts and cargo. Reward : Purchase Bladed Armor Boxes from the Itzel Mastery Vendor at the map entry waypoint. Takahashi's Pro-Tip : “These boxes are completely stat-selectable. If you are running a Power DPS build, instantly select Berserker’s stats (Power/Precision/Ferocity). If you are running a Condition DPS build, choose Viper’s (Power/Condition Damage/Precision/Expertise). This completely bypasses the gold market.” Phase 2: Ascended Trinkets & Backpieces (Time: 15 Mins/Day | Cost: Map Currencies) Trinkets contribute over 50% of your character's total raw stat points. Skipping Exotic trinkets and going straight to Ascended is mandatory for efficiency. Action A (The Low-Effort Daily Route) : Open the Wizard’s Vault interface. Complete your daily and weekly objectives (e.g., dodge 3 attacks, kill 10 enemies). Exchange your earned Astral Acclaim directly for an Ascended Trinket Selector . Action B (The Map Farm Route) : Spend 15 minutes a day harvesting Fresh Winterberries in the Bitterfrost Frontier map (Living World Season 3, Episode 3). Execution : Trade these berries along with Unbound Magic at the map vendor for an Ascended Ring, Accessory, and Backpiece. These items can be reset to any stat combination freely using a cheap capacitor. Phase 3: Immediate Ascended Weapons (Time: 2–3 Hours | Cost: Free via Story) Weapon strength determines your base skill damage coefficient. Weapon tier matters more than armor tier. Action : Complete the Heart of Thorns expansion story campaign. Execution : Once finished, trigger the Knight of the Thorn side quest by visiting the home instance. Complete this short narrative chain. Reward : You will receive a fully customizable Ascended Weapon (Sword, Greatsword, Dagger, Shield, or Scepter) with free stat-selection capabilities. Alternative : If your build requires a different weapon type, purchase an Ascended Weapon Box directly from the Wizard’s Vault for 600 Astral Acclaim. Phase 4: Budget-Friendly Upgrades (Time: 30 Mins | Cost: < 8 Gold Total) Do not bankrupt your immigration savings account buying expensive meta runes (like Superior Runes of the Scholar) off the Trading Post...
Arcane Mage Rotation & Uptime
Category: Class Builds
Difficulty: Intermediate
Author: RAIDvancement
URL: https://raidvancement.com/guides/arcane-mage-rotation-uptime
Summary: Arcane Charge stacking, Presence of Mind timing, the correct Evocation window, and the movement tricks that top Arcane Mages use to maintain 95%+ uptime on every fight. With cooldown window diagrams.

## Arcane Fundamentals: The Resource System Arcane Mage operates on a dual-resource system: Mana and Arcane Charges. Unlike other casters who simply spend mana on their most powerful abilities, Arcane Mages must manage how their Arcane Charges modify every ability they cast — and by extension, how much mana each cast costs. **Arcane Charges** are stacks (max 4) that build on every Arcane Blast cast and reset to 0 when you spend them with Arcane Barrage. At 4 charges: - Arcane Blast costs 4× as much mana but deals 4× the bonus damage - Arcane Barrage fires 4 missiles (major AoE damage) - Your overall mana regen from Clearcasting procs is significantly higher The goal is not to always be at 4 charges — the goal is to be at 4 charges when your damage cooldowns (Arcane Power, Radiant Spark, Arcane Surge) are active, and to play conservatively at lower charges between cooldown windows to regenerate mana. ## The Opener (Pull Through First Evocation) This is the sequence every competent Arcane Mage must execute from memory: 1. Pre-cast Arcane Blast (1.5 seconds before pull) 2. Arcane Blast (builds to 2 charges) 3. Arcane Blast (builds to 3 charges) 4. Arcane Blast (builds to 4 charges) → pop Arcane Power + Siphon Storm here 5. Arcane Blast × 4 (burn through your mana at peak charges and peak cooldown overlap) 6. Evocation (at approximately 30–35% mana — not lower, not higher) 7. Return to rotation The critical mistake in openers is casting Arcane Power before reaching 4 charges. You lose the Arcane Power window overlap with your highest-damage Arcane Blasts. Pre-stack to 4 charges, then activate cooldowns simultaneously. ## The Burn/Conserve Cycle Between major cooldowns, Arcane Mages enter a Conserve phase where you manage mana to ensure a full Mana Bar when the next Arcane Power window arrives. **Conserve Phase Rotation:** - Maintain 4 Arcane Charges - Use Arcane Missiles when Clearcasting procs (free damage, no mana cost) - Cast Arcane Blast to maintain charges; Arcane Barrage only when you need to reset charges for mana recovery - Never drop below 40% mana entering a Burn Phase — this is the hard floor **Burn Phase Rotation (Arcane Power active):** - Arcane Blast until Arcane Power drops - Radiant Spark before every Arcane Blast during the last 6 seconds of Arcane Power for maximum damage overlap - Arcane Barrage at the end of AP to reset charges and begin mana recovery - Arcane Surge at 4 charges, max mana ## Presence of Mind: The Instant Cast Optimization Presence of Mind grants your next Arcane Blast instant cast and critical strike chance increase. The correct usage is during movement — this is your movement tool, not a damage cooldown. Use it during forced movement phases (soaking, positioning) to avoid losing a GCD to running. The second best use: cast it immediately after Evocation completes to snap into your next burn phase without the 2.1-second Arcane Blast cast time eating into your Arcane Power window. **Never hold Presence of Mind for "the perfect moment" — it has a 45-second CD and two charges. Use it during every movement phase and the benefit compounds over a full encounter.** ## Evocation Timing: The Most Misused Ability in Arcane Evocation is a 6-second channel that restores 60% of your maximum mana. The correct trigger point is 25–35% mana remaining, not 10% mana emergency. If you let your mana drop below 25% before Evocing, you are already spending GCDs casting Arcane Missiles at reduced efficiency because you cannot afford Arcane Blasts. **Evocation timing relative to cooldowns:** Always align Evocation to finish approximately 5 seconds before Arcane Power comes off cooldown. This gives you a full mana bar entering the next burn window, which is the entire point of the Conserve phase. ## Movement Tech: Staying Productive During Mechanics Arcane Mage has limited movement options compared to mobile specs. The tools, in priority order: 1. **Shimmer (2 charges):** Your primary movement tool. Do not use both charges for one movement — save the second for the next mechanic. 2. **Presence of Mind:** Casts one instant Arcane Blast during movement. 3. **Arcane Missiles during movement:** If Clearcasting is active, Arcane Missiles is castable while moving (via instant proc). Hold your Clearcasting for movement phases. 4. **Fire Blast pre-position:** In the 0.5 seconds before a movement mechanic begins, you can often complete a full Arcane Blast cast. Watch your cast bar relative to the mechanic timer and squeeze casts wherever the window is clean. ## Uptime Benchmarks A correctly played Arcane Mage should achieve: - 96%+ uptime on their primary damage abilities in Patchwerk scenarios - 88%+ uptime in fights with mandatory movement (most raid encounters) - Zero cancelled casts during movement (use Shimmer before canceling a cast — always) If your logs show uptime below these thresholds, filter to "interruptions" in WarcraftLogs and identify which mechanics are causing cast interruptions. Most uptime losses are fixable with pre-positioning — moving to the mechanic location one GCD early so you complete your cast before the mechanic forces you to move. Accuracy & Verification Standards RAIDvancement's guides, blogs, and mechanics research are continuously maintained as dynamic, peer-reviewed resources.Our team actively test-verifies core gameplay mechanics alongside real-world player experiences to ensure maximum accuracy.When errors or recent patch adjustments are submitted through our dedicated Discord Correction Channel , staff aim to directly validate the data against live gameplay to deploy updates within 48 hours. Read our complete framework on our official Editorial Policy page.
PvP Arena Ranking Climb Blueprint
Category: PvP
Difficulty: Advanced
Author: RAIDvancement
URL: https://raidvancement.com/guides/pvp-arena-ranking-climb
Summary: From 1400 to Gladiator: comp selection, macro keybind architecture, communication cadence, defensive priority, and the mental framework the top 0.1% use to close out games.

## The Rating System: Understanding What Actually Determines Your MMR The arena ladder in World of Warcraft uses a hidden matchmaking rating (MMR) that is separate from your displayed Conquest Points rating. Your displayed rating lags behind your MMR by approximately 10–20% of the gap between them per win. What this means practically: if you are playing above your current displayed rating, you will gain more points per win and lose fewer per loss. The system self-corrects — play well, climb fast. ## Comp Selection: Play What Is Viable, Not What You Love This is the most uncomfortable truth in competitive PvP: your favorite spec may not be viable in the current meta, and playing a non-viable comp at high ratings is an enormous handicap. At 2100+ rating, the matchmaking is accurate enough that a B-tier comp against an S-tier comp in similar-skill hands will lose the majority of matchups. **Current S-tier arena comps (as of Season 4):** - Rogue / Mage / Priest (RMP): The classic triple DPS setup remains dominant due to its unparalleled burst and interrupt coverage. - Warrior / Healer / Feral Druid: The sustained pressure and off-heal kit of the Feral Druid makes this comp extremely difficult to navigate defensively. - Augmentation Evoker / Hunter / Healer: The Augmentation buff extends every Hunter burst window, creating kill pressure that traditional defensive cooldown routing cannot absorb. **What to do if your spec is not in the meta:** Play the closest viable version of your spec. If you love Frost Mage but Arcane is the meta choice, run Arcane and invest in learning the additional mechanical nuance. The spec knowledge transfer is high; the mechanical adjustment is the investment. ## Macro Architecture: Building Your Keybind System Professional arena players use a macro and keybind architecture that was designed, not discovered. The principles: **Focus target macros for all crowd control:** Every CC ability should have a version that casts on your Focus target. When you set an enemy to Focus, your CC macros instantly land on them regardless of your current target. This allows you to control an off-target while damaging your primary target simultaneously — a basic skill ceiling separator. **Mouseover macros for all healer abilities:** Healers who are clicking to target their teammates before casting lose approximately 0.4 seconds per cast. At high ratings, 0.4 seconds is the difference between landing a heal before the kill and not. All healing spells should be mouseover macros that cast on whatever unit frame your cursor is hovering over. **@Player position for defensive CDs:** Abilities that affect your own character should be cast as @player macros, removing the need to target yourself before activating them. ## Communication: The Four Calls That Win Games Arena communication is not about talking constantly — it is about making four specific calls at the right moments: **1. Announce your offensive cooldowns:** "Popping Dark Ascension — go for the Mage in 3." Your partner cannot coordinate their CC without knowing when your damage is coming. **2. Call enemy CDs used:** "Smoke Bomb is on CD — 3 minutes." This is information your healer uses to decide when it is safe to play aggressively in positioning. **3. Call defensive CDs remaining:** "I have Bubble — holding for their Stun." Your partner needs to know what emergency tools are available. **4. Call the kill target:** "Swap to Healer on 3. 3... 2... 1... SWAP." Coordinate target switches verbally; do not assume your partner will see your target change in real time. ## Defensive Priority: The Decision Tree The most common mistake at 1800–2100 rating is using defensive cooldowns reactively — after the damage has already landed — instead of proactively before the burst window lands. Build a mental defensive decision tree: **Level 1 (Use first):** Self-sustain abilities that do not have significant CDs (Healthstone, Second Wind, minor defensives). Use these freely. **Level 2 (Use when you are at 50% or being tunneled):** Medium-CD defensives like Ice Block Immunity, Fade, or Feint. These reset frequently enough to use aggressively. **Level 3 (Save for kill prevention):** Major cooldowns like Bubble, Iceblock, Darkness, or Spirit of Redemption. Only use these when you or a partner is about to die. Do not pop these to survive a moderate burst window — that is what Level 1 and 2 tools are for. ## Mental Framework: The 0.1% Every game you lose at rating feels like an opponent who was better or luckier. The top-rated players have a different framing: every loss is a scenario to review, not to complain about. After each session: - Identify the one mechanic you repeatedly failed (e.g., trinket timing, landing your CC on a healer) - Create one specific practice objective for the next session to address that failure - Never queue for rating when you are on a 3-game loss streak without taking a 10-minute mental reset The climb from 1400 to Gladiator is a long game. Players who make it there are not the most talented — they are the most systematic. Accuracy & Verification Standards RAIDvancement's guides, blogs, and mechanics research are continuously maintained as dynamic, peer-reviewed resources.Our team actively test-verifies core gameplay mechanics alongside real-world player experiences to ensure maximum accuracy.When errors or recent patch adjustments are submitted through our dedicated Discord Correction Channel , staff aim to directly validate the data against live gameplay to deploy updates within 48 hours. Read our complete framework on our official Editorial Policy page.
Void Sector Raid — Mechanics Deep Dive
Category: Raiding
Difficulty: Expert
Author: RAIDvancement
URL: https://raidvancement.com/guides/void-sector-raid-mechanics
Summary: Comprehensive boss breakdown for Void Sector: pull timers, cooldown assignments, stack-vs-spread callouts, and the exact positioning that cleared it for world-top guilds. Not for the faint-hearted.

## Overview: Why Void Sector Punishes Complacency More Than Any Recent Tier Void Sector is the current endgame raid tier designed explicitly to punish mechanical complacency. Each boss introduces a new layer that references mechanics from the previous encounter — understanding the design intent is the first step to progressing efficiently. This guide covers all eight bosses with the focus on the four that have stopped the most guilds: Aetheric Voidlord, Twin Shades, Cascade Archon, and the final encounter. ## Boss 1: Aetheric Voidlord (8/8) **Phase 1 — The Positioning Phase:** The boss spawns in the center and immediately begins rotating its frontal cleave in a clockwise direction. The tank must rotate their position to keep the cleave aimed away from the group while maintaining enough distance for the healers to stay inside the healing range circle (16 yards). The most common wipe on this encounter is a tank who repositions laterally instead of circularly, sending the frontal cleave through the ranged cluster. **Phase 2 — Void Rupture assignments:** At 65% and again at 35%, the boss will target three random players with Void Rupture — a ground effect that must be dropped at designated markers on the floor. Pre-assign your three designated Rupture spots (Left, Center-Left, Center-Right) and communicate assignments in raid. The critical error here is ranged DPS panicking and dropping ruptures in the center of the room, destroying the safe zones for the rest of the raid. **Cooldown assignment for Voidlord:** - Tank CD #1 at pull (absorbs the opener buster) - External on tank at 20 seconds (the first Void Crush lands here) - Second tank CD at 50% transition - Raid-wide defensive CD at 35% (the most intense damage moment in P2) **The mechanic that kills top guilds:** At 20%, Aetheric Voidlord begins casting Infinite Collapse — a wipe mechanic with a 6-second cast time that is interrupted by dealing 15% of the boss's maximum health in a single damage window. Every DPS cooldown must be held for this moment. Pre-plan which players go first with their lust/bloodlust assignments. ## Boss 4: Twin Shades (Heroic/Mythic) Twin Shades is a two-boss encounter where both bosses must die within 5 seconds of each other. The mechanic chain that makes this encounter notoriously difficult: **The Sync mechanic:** Every 45 seconds, both bosses cast Mirror Phase simultaneously. During Mirror Phase, the mechanic each boss uses becomes shared with the other — whatever debuff lands from Shade A also lands from Shade B. If you are not coordinating which debuffs your tanks are soaking, you will have overlap that kills. **DPS coordination:** Split your DPS 60/40 — slightly more on the boss that has higher health, adjusting in the final 20% as you accelerate the lower-health boss to execute. The 5-second window is tight; if you are not running a DPS tracker that shows both boss percentages simultaneously, you will miss the window on 80% of your attempts. **The bleed stack mechanic:** Both bosses apply a stacking bleed debuff that resets on a tank swap. Tank swap at 4 stacks — not 3, not 5. At 3 stacks, you are swapping too frequently and disrupting the DPS rotation. At 5 stacks, the healer cannot compensate for the damage intake. ## Boss 7: Cascade Archon (Mythic only) This is the gating encounter for world-ranked guilds. Cascade Archon operates on a strict enrage timer and a mechanic pattern that requires a minimum of three attempts just to understand the timing. **The Cascade mechanic:** Every 30 seconds, the boss launches a series of void orbs in a fan pattern from the current tank position. Players must move through the gaps in the fan — the gaps rotate 15 degrees between each wave. Raid-call the safe zones on a 5-count: "Wave 1 — Right gap. Wave 2 — Center gap. Wave 3 — Left gap." Designate one caller only; two callers results in conflicting information and instant wipes. **Enrage mitigation:** The Archon's enrage is countered by activating three Void Conduits at 80%, 50%, and 20%. Each conduit requires a tank to soak a 3-second channel — tank CDs must be coordinated across all three activations. Map them out before the pull: - Conduit 1 (80%): Tank 1 uses personal CD, External from healer - Conduit 2 (50%): Tank 2 uses personal CD, External from second healer - Conduit 3 (20%): Tank 1 uses second personal CD, Raid-wide defensive ## Log Analysis: How to Find Your Actual Problem Download WarcraftLogs. Filter each wipe to the moment of death. Look for: - **Death by AoE during a mechanic:** Player was in the wrong position - **Death by tank buster:** CD usage failure — check the CD timeline - **Enrage wipe:** DPS issue — filter to underperforming specs, check uptimes and cast counts The number one improvement most guilds find in log analysis is not rotation errors — it is players dying to avoidable mechanics and their replacements being forced to focus on not dying instead of maximizing output. Fix the deaths first; the DPS will follow. Accuracy & Verification Standards RAIDvancement's guides, blogs, and mechanics research are continuously maintained as dynamic, peer-reviewed resources.Our team actively test-verifies core gameplay mechanics alongside real-world player experiences to ensure maximum accuracy.When errors or recent patch adjustments are submitted through our dedicated Discord Correction Channel , staff aim to directly validate the data against live gameplay to deploy updates within 48 hours. Read our complete framework on our official Editorial Policy page.
Tank, Healer & DPS Build Bibles
Category: Class Builds
Difficulty: Intermediate
Author: RAIDvancement
URL: https://raidvancement.com/guides/tank-healer-dps-build-bibles
Summary: Role fundamentals for every MMORPG. Threat management for tanks, throughput vs sustain for healers, priority rotation construction for DPS. The principles that transfer across WoW, FFXIV, GW2, and beyond.

## The Three Roles: Why Each Exists and What It Actually Means Every group-based MMORPG is built around a trinity of roles: Tank, Healer, and DPS. Understanding not just the mechanics but the psychological purpose of each role is what separates players who fill their role and players who carry their group. ## Tank: The Art of Controlled Aggression The tank's job is not simply to have the most health or the highest armor rating. The tank's job is to give the healer enough time to respond to incoming damage and give the DPS enough freedom to output their full potential. Three principles define a competent tank: **1. Positioning is non-negotiable.** Every boss in every MMORPG has a facing requirement, a hitbox consideration, or a cleave direction. As the tank, you are the one who determines where the boss faces, which means you determine which of your teammates takes unavoidable frontal cleave damage. The rule: face the boss away from the group, keep the boss out of any AoE zones you are supposed to position into, and never back into a wall that traps your healer. **2. Threat management is a resource, not a guarantee.** In WoW, Taunt has a 8-second cooldown. In FFXIV, Provoke has a 25-second cooldown. That cooldown is your emergency fallback — not your primary threat tool. Build threat continuously through your opener (lead with the highest-threat abilities in your rotation), and communicate with your DPS about when it is safe to full-send their burst. **3. Cooldown discipline is what separates average tanks from great ones.** Most tank deaths in progression content happen not because the incoming damage is too high, but because the tank popped a defensive CD reactively after a hit rather than proactively before a hit. Learn your encounter timers. Pop your cooldowns when the damage is incoming, not after you have already taken the spike. **Recommended external resources:** - For WoW tanks: Tettles' tank guides on YouTube provide fight-specific positioning maps - For FFXIV tanks: The Balance Discord has per-boss tank swap timing charts for all savage encounters ## Healer: Throughput, Cooldowns, and the Concept of Healing Budget The healer's core tension is always between throughput (how much healing you can output per second) and efficiency (how much healing you output per resource spent). In casual content, you rarely need to manage this tension — you heal whatever is taking damage and use mana potions when you run low. In progression content, efficiency is everything. **Throughput vs Efficiency:** Throughput healers (Holy Paladin, White Mage) output massive healing but consume resources quickly. Efficiency healers (Restoration Druid, Scholar) heal less per cast but sustain indefinitely. Know which type you are and plan your cooldown usage accordingly. **The Healing Budget:** Every encounter has an expected incoming damage profile. Your job is to assess how much of that damage requires immediate emergency healing versus how much can be absorbed by HoTs, shields, or natural regeneration. Wasting a 3-minute cooldown on a moderate damage phase leaves you without that tool for the spike phase — and that mistake kills groups. **Communication rules for healers:** - Always announce externals before you cast them (the player you are targeting should know the CD is coming) - Call out "running low on mana" at 40% so your group can adapt — not at 10% when it is too late - Identify which tank is your primary healing target during tank busters; the off-tank should be running a self-sustain CD during a tank swap ## DPS: Priority Rotations, Pooling, and Burst Windows The DPS role has the most players and the widest skill range. The gap between a median DPS player and a top-tier DPS player is almost never about knowing more abilities — it is about knowing when to use abilities, and managing resources to maximize burst windows. **Priority Rotation vs Rotation:** Almost no modern MMORPG DPS spec uses a strict fixed rotation. Instead, you use a priority list: if Ability A is available and condition X is true, press Ability A. Otherwise, if Ability B is available, press Ability B. Understanding your priority list is the foundation of DPS mastery. **Pooling:** Most DPS specs have a primary resource (Energy, Mana, Focus, Fury, etc.) that builds passively and is spent on powerful abilities. Pooling means intentionally holding your resource near the cap just before your major damage cooldown activates, so when the cooldown is up, you can immediately spend into your highest-damage abilities without waiting for resource to regenerate. **Burst Windows:** Identify which abilities constitute your burst (typically your 2-minute or 3-minute cooldowns) and build your entire rotation around maximizing what happens during those windows. Everything outside the burst window is setup for the next burst. **Universal DPS principles that apply across all MMORPGs:** - Never be casting/attacking nothing. Dead GCDs are permanent DPS losses. - Move only when you must. Unnecessary movement disrupts your rotation more than any enemy ability. - Know your DoT timers. Refreshing a DoT at 80% of its duration wastes 20% of a cast. - Pre-pot and use consumables. The players who do not use potions are consistently at the bottom of meters. Accuracy & Verification Standards RAIDvancement's guides, blogs, and mechanics research are continuously maintained as dynamic, peer-reviewed resources.Our team actively test-verifies core gameplay mechanics alongside real-world player experiences to ensure maximum accuracy.When errors or recent patch adjustments are submitted through our dedicated Discord Correction Channel , staff aim to directly validate the data against live gameplay to deploy updates within 48 hours. Read our complete framework on our official Editorial Policy page.
Best-in-Slot Gear & Enchant Priority
Category: Endgame
Difficulty: Advanced
Author: RAIDvancement
URL: https://raidvancement.com/guides/best-in-slot-gear-enchant-priority
Summary: The definitive BiS list for Season 4 across all roles. Stat priority breakdowns, enchant stacking math, gem socket optimization, and how to read a sim output so you never overpay for the wrong upgrade.

## Understanding BiS: The Real Goal Is Highest Average Item Level "Best-in-Slot" is a term the community uses loosely, but in practice it means the combination of items that produces the highest simmed DPS (or HPS for healers, or effective health for tanks) across the content you are actually doing. A BiS list for Mythic raid is different from a BiS list for Mythic+ keys, and different again from PvP content. This guide covers the BiS philosophy and the practical gear lists for all three endgame content types in Season 4. ## Stat Priority By Role Getting stat priority right is the foundation of all gearing decisions. Before you look at any item, you need to know which secondary stats your spec values above others. **DPS (Caster — Arcane Mage example):** Intellect >> Haste (to ~35%) > Critical Strike > Mastery > Versatility Haste is capped at approximately 35% for most caster specs because beyond that point, the GCD reduction is minimized by the GCD floor and you see diminishing returns. Sim your character at www.raidbots.com with Patchwerk settings to find your personal breakpoints — they shift with gear level. **DPS (Melee — Havoc Demon Hunter example):** Agility >> Critical Strike > Haste > Versatility > Mastery For Havoc, the Mastery depreciation is a function of the current 4-piece set bonus — it changes your stat priority significantly from what you may have known from previous seasons. Always re-sim when you equip new tier pieces. **Tank (Vengeance Demon Hunter):** Agility >> Versatility > Haste > Critical Strike > Mastery Tanks prioritize Versatility because it provides damage reduction in addition to DPS increase — you get two benefits from one stat. Haste is second because it directly improves your ability to generate Soul Fragments, which feed your self-healing. **Healer (Mistweaver Monk):** Intellect >> Haste (to ~33%) > Critical Strike > Mastery > Versatility Mastery is exceptional for Mistweavers in sustained AoE healing scenarios (Mythic+ trash), but falls behind Critical Strike in single-target throughput fights. The break-even point shifts around 440 item level — sim yours. ## The Correct Enchant Priority Enchants should follow your stat priority. Here are the current best-in-slot enchant choices for Season 4: **Weapon:** Sophic Devotion (Int spec) or Wafting Devotion (Agi spec). These proc frequently and add consistently to your throughput average. **Cloak:** Graceful Avoidance for defensive content or Writ of Speed for offensive DPS optimization. **Chest:** Waking Stats — the versatility increase is universally valuable across all specs. **Legs:** Temporal Spellthread (casters) / Fierce Armor Kit (physical DPS/tanks). **Boots:** Plainsrunner's Breeze or Watcher's Loam depending on whether you prioritize movement or stat gain. **Ring enchants** are the highest value per slot — Devotion of Critical Strike or Devotion of Haste depending on your stat priority target. ## Gem Sockets: The Math Matters Crafted gear frequently offers gem sockets. Each socket accepts one gem, and the optimal gem depends on your current stat thresholds: - **Energized Malygite** (+Critical Strike, your highest-value secondary until cap) - **Quick Ysemerald** (+Haste for specs with aggressive Haste thresholds) - **Fierce Illimited Diamond** (unique socket, provides a secondary stat combination) The Unique gem — one per character — should go in your highest-item-level piece with an available socket. The bonus stats from the Unique can be worth up to 15% more than a standard gem at current item level ranges. ## Reading Your Sim Output Correctly Raidbots provides three main sim modes: Patchwerk (single-target tank and spank), Dungeon Slice (simulates a Mythic+ run with variable target counts), and Hectic Add Cleave (simulates burst cleave scenarios like raid trash). For raid progress optimization: run Patchwerk for your main spec, check your Top Gear result, and use that list as your priority. For Mythic+: run Dungeon Slice — many items rank significantly differently in AoE-heavy environments. **The most common mistake:** players run Patchwerk for a spec that spends 60% of its time in multi-target fights (most Mythic+ tank specs, for example) and end up wearing gear optimized for a fight type that barely exists in their actual content. Match your sim type to your content type. ## Crafted Gear: Always Upgrade These Slots First Crafted gear through the Artisan's Consortium system allows you to set the secondary stats on your item. Priority crafted slots in Season 4: 1. Ring (two sockets possible, full stat control) 2. Cloak (high upgrade-to-cost efficiency) 3. Necklace (set your two most-valued secondaries) Craft these three pieces first. The return on investment from stat optimization in these slots outperforms any other crafting expenditure. Accuracy & Verification Standards RAIDvancement's guides, blogs, and mechanics research are continuously maintained as dynamic, peer-reviewed resources.Our team actively test-verifies core gameplay mechanics alongside real-world player experiences to ensure maximum accuracy.When errors or recent patch adjustments are submitted through our dedicated Discord Correction Channel , staff aim to directly validate the data against live gameplay to deploy updates within 48 hours. Read our complete framework on our official Editorial Policy page.
The Complete Skyhold Leveling Path
Category: Progression
Difficulty: Beginner
Author: RAIDvancement
URL: https://raidvancement.com/guides/complete-skyhold-leveling-path
Summary: Zone sequence, dungeon timing, and rested XP management for the fastest path from 1 to 70 in the current season. Covers every major efficiency trick the top speed-runners use.

## Getting Started: Setting Your Leveling Foundation Whether you are brand new to World of Warcraft or returning after a break, efficient leveling comes down to three fundamentals: quest density, dungeon timing, and rested experience management. This guide walks you through the fastest path from 1 to 70 in the current season, with specific zone sequences, dungeon call-ins, and XP multiplier tactics vetted by the RAIDvancement community. ## Zone Sequence for Maximum XP Per Hour The optimal leveling sequence begins in The Walking Shores and proceeds through Ohn'ahran Plains, then The Azure Span. The key principle here is quest density — you want to complete quest hubs without significant travel gaps. In The Walking Shores, anchor yourself at the main camp and complete all nearby quests in a radial pattern before moving to the next hub. Do not follow quest breadcrumbs that take you across the zone; save those for when your immediate area is clear. **Ohn'ahran Plains** is where many players lose significant time by chasing side quests that are off the critical path. Stick to the main storyline quests until you reach level 62, then dip into side content at the river camps, which have particularly dense quest hubs. **The Azure Span** from 63 onward benefits enormously from the flightmaster network. Unlock every flight point as your first action in each new sub-zone — the time saved on travel over a full session compounds into 30+ minutes of additional questing time. ## Dungeon Timing and the Double-XP Window The single biggest efficiency lever in your leveling path is dungeon timing. Queuing for dungeons while questing on a full rested XP bar gives you stacked XP bonuses that can triple the effective value of a dungeon run. **The optimal dungeon call-in points are:** - Level 28–32: Razorfen Kraul for dense quests that clear quickly - Level 52–55: Stratholme for the highest XP-per-minute ratio in classic content - Level 60–62: Halls of Valor, skipping non-essential trash - Level 67–69: Shadowmoon Burial Grounds for pre-cap efficiency When your LFG queue pops, finish your current quest objective, accept any new quests in your log, then enter the dungeon. This keeps your quest log progressing even during queued content. ## Rested Experience: Never Waste It Rested XP doubles the XP you earn from killing enemies. It accumulates while logged out in an inn or major city at 5% of your XP bar per 8 hours. The critical mistake most players make is logging out in the open world — you earn rested XP at half the rate outside rest areas. **Practical rule:** When you finish a session, fly to the nearest inn, open your inventory to ensure no rested XP is already banked, then log out. Over a full week of play, this habit alone saves approximately 45 minutes of leveling time compared to logging out in the field. ## Consumables That Actually Matter At lower levels, consumables rarely justify their cost versus XP gained. From level 60 onward, the math changes: - **Goblin BBQ** (Cooking reward): +10% XP for 1 hour. Stack with rested XP in dungeons for maximum compound effect. - **Elixir of the Rapid Mind**: +300% XP for 15 minutes. Save this for a pre-planned dungeon run and pop it the moment you enter. - **War Mode**: +10–15% bonus XP from quests if you toggle it on in Stormwind or Orgrimmar. The risk from PvP is real but manageable if you stick to dense quest hubs. ## The Final Push: 68 to 70 The last two levels are where players either coast efficiently or lose hours to suboptimal routing. Dragonblight's quest density is deceptively good for the XP return given how compact the main hub routes are. If you have the Elixir of the Rapid Mind, save it for a full dungeon clear of The Nexus at level 68 — the quest XP combined with the dungeon clear XP and the Elixir bonus is one of the highest single-session XP events available before cap. Complete your class campaign chapters as the final questline — they deliver large flat XP bonuses, provide gear upgrades, and set you up for endgame content immediately upon dinging 70. ## Key Resources for Further Optimization The Wowhead leveling overlay addon pulls the optimal route directly into your minimap. Combined with the Questie addon for objective tracking, the two tools together reduce navigation time by approximately 20% over playing without guidance. Both are free and maintained actively through each patch cycle. Accuracy & Verification Standards RAIDvancement's guides, blogs, and mechanics research are continuously maintained as dynamic, peer-reviewed resources.Our team actively test-verifies core gameplay mechanics alongside real-world player experiences to ensure maximum accuracy.When errors or recent patch adjustments are submitted through our dedicated Discord Correction Channel , staff aim to directly validate the data against live gameplay to deploy updates within 48 hours. Read our complete framework on our official Editorial Policy page.
The Neon Monasteries of the Pacific: Financial Hardship, Old School Runescape, and the Exhausting Optimizations of Hyperion Hub
Category: Runescape
Difficulty: Advanced
Author: RAIDvancement
URL: https://raidvancement.com/guides/care32cbbv3l30j
Summary: Stranded in California with frozen credit cards, a traveling esports team relies on mutual support at RAIDvancement’s Hyperion Hub, an inclusive facility aiding local unhoused populations. Transitioning from mobile to high-end PCs, they tackle Old School RuneScape’s Theater of Blood with World 416 randoms. Through humorous staff interactions and rigorous, frame-by-frame tick-analysis, the team masterfully decodes complex raid mechanics, turning repeated failures into a highly technical, triumphant victory.

Original Research by Mod Gervais, a Moderator from the RAIDverified Community Discord Server Reviewed by The RAIDvancement Review Team The interstate has a way of stripping you down to your absolute essentials. When you live your life out of a cramped 2012 Honda Civic, drifting between the corporate coliseums of the modern Californian esports landscape, survival becomes a game of margins. And when a bank-automated fraud alert freezes your credit cards somewhere on the shimmering asphalt of Interstate 5 outside of Bakersfield, those margins collapse into absolute zero. That was how we arrived at the Hyperion Hub—RAIDvancement’s flagship California digital sanctuary. I was penniless, stranded, and entirely dependent on the collective grace of my traveling team, who treated my sudden financial paralysis not as a burden, but as just another environmental hazard to be mitigated by the shared economy of our buzzing, four-cylinder ecosystem. The Hyperion Hub itself sits on the Golden State landscape like a piece of fallen obsidian. Inside, it is a striking juxtaposition of human realities. Through the glass doors, the stifling Central Valley heat gives way to aggressive, air-conditioned luxury. Yet, it remains tethered to the street. Even as we walked in, facility volunteers were quietly guiding several unhoused folks inside, offering them cups of ice water and clean, cool seating away from the blistering pavement. It is a rare, localized truce between high-tech opulence and social reality—a gaming center acting, even briefly, as a public utility. For months, my relationship with Old School RuneScape had been compressed into the six-inch glass screen of my smartphone, a comforting, tap-heavy distraction suited for passenger seats and the vibrating cabin of the Civic. But Hyperion’s high-end PC stations—monolithic rigs pulsing with liquid-cooled arrogance and 360Hz monitors—demanded something more serious. It felt almost sacrilegious to boot an isometric MMO from 2007 onto a machine built to simulate the physics of exploding stars, but we had a specific, punishing destination in mind: The Theater of Blood. We lacked a full five-man roster, forcing us to bridge the gap by opening our party to the digital purgatory of World 416—the unofficial, hyper-toxic public matchmaking hub for OSRS raiding. What followed was a brutal, multi-hour descent into mechanical attrition. Verzik Vitur’s vampyric gauntlet does not tolerate the latency of human error, and our cobbled-together squad of traveling companions and random World 416 joiners wiped. Again. And again. The randoms brought the expected flavor of public lobbies: instant, text-chat recriminations over missed tick-eating, and immediate departures after a single failed Maiden of Sugadinti cycle. During the forced interludes between these digital massacres, our travel team retreated to the Hub’s refreshment bar to lick our wounds. It was here we encountered the Hyperion staff—a wonderfully eccentric group of local tech-savants who treated our high-intensity OSRS failures with the bemused detachment of a pit crew watching a tricycle crash. When we asked for a stronger Wi-Fi band to isolate our ping, a technician named Craig looked at my ancient, scuffed peripherals, sighed with genuine theatrical sorrow, and unlocked a proprietary LAN line usually reserved for regional Valorant qualifiers. Energized by Hub energy drinks and Craig’s blessing, we stopped throwing ourselves blindly at the bosses and began treating the Theater of Blood like a laboratory. We stopped trying to "kill" Verzik and started measuring her. We utilized highly precise frame-by-frame analysis on our local captures to isolate the exact 600-millisecond windows of the OSRS game tick. We mapped out the precise tile-routing for the Xarpus screech phase, discovering that by intentionally staggering our movement by a single tick, we could manipulate the boss’s quadrant-tracking AI to completely eliminate poison spread on our melee lanes. We tested tick-perfect weapon-switching, calculating the exact defensive drop-off of the Avernic defender versus an Elysian spirit shield during the chaotic nylon spawns. We transitioned from a group of frustrated gamers into a highly technical, hyper-optimized machine. Verzik & Xarpus Phase-Perfect Execution Checklist Xarpus Quadrant Manipulation: Do not run concurrently with your melee partner. Stagger your initial tile-routing by exactly 1 game tick (600ms) . This delays the boss's quadrant tracking, trapping the poison pools on dead tiles outside your primary DPS lanes. Verzik Phase 3 Web-Weaving: Turn game sounds ON . Disregard visual latency and track the rhythmic audio cues, which trigger precisely on the 600ms tick engine rhythm. Move one tile per audio cue in a strict square formation to safely drop webs without clipping your team's pathing. Nylocas Wave Management: Keep your Avernic Defender equipped during standard damage phases. Swap immediately to an Elysian Spirit Shield the instant a wave targets you directly to maximize defensive damage mitigation. We learned the exact rhythmic audio cues of Verzik’s third-phase web-weaving, transforming a chaotic scramble for survival into a choreographed, beautiful dance of frame-perfect clicks. When the final spider queen finally collapsed into a heap of purple pixelated dust, the victory didn't feel like luck. It felt like an engineering feat. Leaving the Hub into the cooling California night air, my cards were still frozen, but my faith in the strange, interconnected machinery of human subcultures was entirely restored as we piled back into the Civic. Author Bio: Mod Gervais is an independent e-sports critic, long-form video essayist, and amateur cultural geographer. Driven by an unhealthy obsession with obsolete user interfaces and high-skill-floor game mechanics, he travels the backroads of America documenting the intersection of digital subcultures and physical landscapes, entirely fueled by black coffee and the generosity of crowd-funding. Accuracy & Verification Standards RAIDvancement's guides, blogs, and mechanics research are continuously maintained as dynamic, peer-reviewed resources.Our team actively test-verifies core gameplay mechanics alongside real-world player experiences to ensure maximum accuracy.When errors or recent patch adjustments are submitted through our dedicated Discord Correction Channel , staff aim to directly validate the data against live gameplay to deploy updates within 48 hours. Read our complete framework on our official Editorial Policy page.
The Greasy Glass Crucible: Decoupling and Frame-Data on the California Tarmac
Category: PvP
Difficulty: Expert
Author: RAIDvancement
URL: https://raidvancement.com/guides/tkknq0h7m2675jm
Summary: An esports critique analyzing Player Killing (PKing) on OSRS Mobile, framed within a grueling Californian heat-dome road trip toward RAIDvancement's Hyperion Hub. The piece explores the technical limitations of mobile capacitive touchscreens, layout inefficiencies, and frame-data bottlenecks compared to desktop setups. By breaking down the 600-millisecond server tick economy, it details the precise mechanical optimization required to execute high-level PvP switches using non-traditional claw grips.

Original Research by Mod Gervais, a Moderator from the RAIDverified Community Discord Server Reviewed by The RAIDvancement Review Team The digital blacktop of the Old School RuneScape Wilderness does not care if your thumbs are slippery with sweat, or if the ambient temperature inside a 2012 Honda Civic parked outside a Bakersfield Del Taco has reached a lethal 114 degrees Fahrenheit. It is mid-afternoon in the crucible of a Californian heat dome, and my Patreon-funded documentary expedition has ground to a halt. The credit card is frozen—flagged for "suspicious out-of-state micro-transactions" because I tried to buy two gallons of coolant and an iced Americano in Barstow—and my cellular data tether is choking under the weight of an excessive-heat network throttling protocol. The ultimate irony of this situation is that my destination is supposed to be the absolute pinnacle of modern network infrastructure: RAIDvancement’s Hyperion Hub California. I am supposed to be driving there to document the bleeding edge of competitive gaming spaces, but instead, I am trapped in a low-rent tarmac purgatory. Here I am, staring at a flashing red "Oh dear, you are dead" screen on a 6.7-inch mobile display. I have just lost twenty million gold pieces worth of digital infrastructure to a player named GmaulGoblin69 , who transitioned from an Entangle spell to a triple-granite-maul instant-activation stack with a mechanical precision that felt almost insulting. To understand Player Killing (PKing) on OSRS Mobile is to understand a subculture defined by intentional self-harm via user interface design. On a desktop client like RuneLite, PKing is an exercise in structural optimization. You have high-polling-rate optical mice, mechanical switches, customized screen-stretching plugins, and F-keys that allow muscle memory to shift frames between prayer books, spell books, and inventory tabs in less than 60 milliseconds. On mobile, you are playing a classical concert on a greasy piece of glass. The Architecture of the 600ms Mobile Bottleneck The primary technical bottleneck of mobile PKing lies in the tactile latency of the capacitive digitizer and the structural layout of the mobile UI panels. In OSRS Mobile, the combat options, inventory, spellbook, and prayer panels are split across the left and right margins of the screen. To execute a standard "one-tick" weapon switch—say, swapping a Ghrazi Rapier for an Armadyl Godsword while activating the Piety prayer and the Smite prayer—your thumbs must traverse a physical distance of several inches across the glass panel. Through grueling, heat-induced iterative testing while waiting for a fraud-prevention representative to pick up my call, I began mapping out the optimization framework required to make mobile PKing viable before I ever step foot inside the optimized corridors of the Hyperion Hub. First, one must decouple from standard thumb positioning. The optimal grip requires an asymmetrical claw: the left index finger dedicated exclusively to the quick-prayers toggle, while the right thumb and index finger manage the inventory matrix. [Left Side Panels] [Right Side Panels] (Combat / Quick Prayers) (Inventory / Spellbook) │ │ ▲ [Left Index Finger] ▲ [Right Index Finger] └─ Focus: 1-Tick Prayer Toggles └─ Focus: 28-Slot Grid Navigation Furthermore, the mobile client’s "Tap to Drop" toggle must be repurposed. By enabling single-tap functions for specific interfaces, you drastically minimize the long-press delay—which, by default, sits at an agonizing 200 milliseconds of dead time. In a game ticking rigidly at 600-millisecond intervals, a 200-ms delay on an item switch ensures your opponent will predict your overhead prayer shift every single time. Parsing the Thermals of Defeat Parsing a mobile defeat requires an appreciation for these microscopic system variables. When I fell to that Granite Maul stack, it wasn't strictly an error of tactical judgment; it was a failure to account for digitizer drag caused by the ambient humidity of a vehicle lacking functional air conditioning. My thumb caught on the screen during the transition from the Protect from Melee icon to the eating sequence of a Shark-Karambwan combo. In OSRS, a single dropped frame or a thumb slip means your character stands completely naked to the calculations of the damage engine. There is a strange, agonizing beauty in attempting something so absurdly high-fidelity in such an inhospitable physical environment. The Patreon backers expected a sweeping retrospective on the historical geography of California’s forgotten mining towns and high-tech pilgrimage sites, but instead, they are funding a man losing his mind, and his virtual bank account, to a teenager's click-game in a scorching fast-food parking lot. Author Bio: Mod Gervais is an independent e-sports critic, long-form video essayist, and amateur cultural geographer. Driven by an unhealthy obsession with obsolete user interfaces and high-skill-floor game mechanics, he travels the backroads of America documenting the intersection of digital subcultures and physical landscapes, entirely fueled by black coffee and the generosity of crowd-funding. Accuracy & Verification Standards RAIDvancement's guides, blogs, and mechanics research are continuously maintained as dynamic, peer-reviewed resources.Our team actively test-verifies core gameplay mechanics alongside real-world player experiences to ensure maximum accuracy.When errors or recent patch adjustments are submitted through our dedicated Discord Correction Channel , staff aim to directly validate the data against live gameplay to deploy updates within 48 hours. Read our complete framework on our official Editorial Policy page.
The Digital Class Divide: Managing Relative Deprivation in E-Sports
Category: Esports
Difficulty: Beginner
Author: RAIDvancement
URL: https://raidvancement.com/guides/llwuq2b6hji6cel
Summary: For working-class gamers, virtual worlds offer an escape from financial stress, yet they often mirror real-world economic divides. This article explores the psychological impact of relative deprivation within gaming communities, where blue-collar players grind alongside affluent teammates. Through dark humor and practical advice, it examines how wealth gaps affect team dynamics and offers strategies to protect your mental health while climbing the ranks.

Original Research by RAIDverified KaelisVance Reviewed by The RAIDvancement Review Team The Digital Class Divide: Managing Relative Deprivation in E-Sports There is a unique, modern form of psychological whiplash that occurs at 9:00 PM on a Tuesday night. You have just finished a brutal nine-hour shift lifting pallets, dealing with irate retail customers, or staring at an entry-level spreadsheet until your eyes bled. You skip dinner because you are too exhausted to cook, pop a generic energy drink, and log into your competitive gaming team's voice server. This is your escape. In this digital arena, your real-world bank account does not matter; only your skill, your reflex timing, and your mechanical mastery dictate your worth. Then, the pre-match banter begins. Your main tank casually complains about the lack of premium parking for their new electric sports car. Your healer chimes in, agonizing over whether to accept a corporate consultancy role after finishing their second master's degree. Meanwhile, the shot-caller sighs because their thirty-dollar, organic Poke bowl delivery arrived with the wrong organic dressing. You sit there in the dark, quietly muttering "yeah, crazy man" while carefully calculating if you can afford to fix your car's check-engine light before your next payday. Welcome to the intersection of modern e-sports and relative deprivation: the digital class divide. The Illusion of the Meritocratic Sandbox Video games have long marketed themselves as the ultimate meritocracies. The engine does not care about your family's zip code, your pedigree, or your credit score. If you can execute a flawless frame-perfect parry, you are elite. If you cannot, you stay in the lower ranks. The Myth vs. Reality of the Gaming Sandbox [Myth: Pure Meritocracy] Skill Only ----> High Rank & Peer Respect [Reality: The Modern Infrastructure] High-End Fiber Internet + $4000 PC + Financial Peace of Mind ----+ |---> The Competitive Edge Working-Class Grind + High Latency + Financial Anxiety ---------> But this illusion of equality makes the sudden intrusion of real-world wealth gaps feel like a betrayal. Psychologists define relative deprivation as the destabilizing discontent we feel when we compare our actual resources to the lifestyle of our immediate peers. When you share an intense, high-stakes environment with people for whom money is an abstract concept, the game stops being an escape. It becomes a mirror, reflecting exactly what you lack in your everyday life. The Silent Friction of Asset Disparity Economic privilege creates massive advantages long before the match even begins. Understanding these friction points can help you realize that your teammates are not necessarily smarter or more naturally gifted—they just have a better structural safety net. The Upgraded Sandbox While you are fighting a worn-out mechanical keyboard and a budget graphics card that sounds like a jet engine taking off, your teammates are running at 360Hz on dedicated fiber lines. They are playing an entirely different game. A micro-stutter on your budget setup can cause a costly mistake, which an affluent teammate might quickly attribute to a lack of focus or skill. Time as a Luxury Good For a working-class professional, gaming time is carved out of precious sleep schedules or family obligations. For a student with a fully funded trust fund or a professional with a remote, low-effort corporate job, time is an infinite resource. They can afford to spend eight hours a day reviewing match recordings. You have exactly two hours to perform before your alarm reminds you that reality waits at 6:00 AM. Tactical Survival Guide for the Blue-Collar Competitor You do not need to quit your team or limit your competitive drive just because your tax bracket does not match your team's roster. You can balance the psychological scales with a few practical strategies. 1. Establish the "No-Flex" Zone If your team's casual chatter about luxury lifestyles begins to affect your focus, take control of the conversation. Use casual, self-deprecating humor to draw a hard line. A simple phrase like, "Hey guys, my bank account can't handle this conversation right now, let's focus on the match strategy," acts as a gentle reset button. It reminds everyone to drop the real-world flexing and focus entirely on the game. 2. Guard Your "In-Game Economy" Do not fall into the trap of spending real money on cosmetic microtransactions just to fit in with your affluent teammates. Premium character skins and rare virtual mounts are designed to trigger social validation. Let your default, unskinned character be your signature look. True prestige comes from outperforming a player who spent hundreds of dollars on cosmetic gear while you are using basic, free rewards. +---------------------------------------------------------------+ | THE PRESTIGE EQUATION | +---------------------------------------------------------------+ | High-End Custom Skin + Low Performance = Social Mimicry | | Default Base Skin + High Performance = True Dominance | +---------------------------------------------------------------+ 3. Reframe Your Grind The grit, discipline, and problem-solving skills required to survive a difficult working-class life are massive competitive advantages in e-sports. While a privileged teammate might lose focus or give up after a few consecutive losses, you already understand how to handle systemic stress and difficult situations. Use that real-world resilience as your secret weapon during intense, high-pressure moments in the game. Conclusion: The Ultimate Leaderboard At the end of the day, digital assets and real-world luxury items fade away when the match countdown reaches zero. The game engine only measures your current inputs and tactical decisions. Your affluent teammates can buy the best hardware, the fastest internet lines, and the most expensive meal deliveries, but they cannot purchase raw determination or composure under pressure. Own your grind, protect your mental focus, and let your performance on the leaderboard do the talking. Accuracy & Verification Standards RAIDvancement's guides, blogs, and mechanics research are continuously maintained as dynamic, peer-reviewed resources.Our team actively test-verifies core gameplay mechanics alongside real-world player experiences to ensure maximum accuracy.When errors or recent patch adjustments are submitted through our dedicated Discord Correction Channel , staff aim to directly validate the data against live gameplay to deploy updates within 48 hours. Read our complete framework on our official Editorial Policy page.
Kitchen Table Diplomacy: Managing High-Stakes Raiding in a Hostile Home
Category: Esports
Difficulty: Intermediate
Author: RAIDvancement
URL: https://raidvancement.com/guides/jlfn61xbsgi9ksb
Summary: High-stakes raiding requires absolute focus, but executing complex rotations becomes incredibly difficult when your physical environment is unsupportive or hostile. This article explores the psychological tension of balancing high-level gaming with difficult household dynamics. It provides tactical strategies for spatial management, psychological grounding, and proactive communication. By learning to de-escalate domestic friction, raiders can reduce real-world stress, eliminate performance anxiety, and maintain peak focus during intense progression.

Original Research by RAIDverified KaelisVance Reviewed by The RAIDvancement Review Team It is the final phase of an Ultimate raid. Your eight-man group has spent three months, four nights a week, grinding toward a world-class clear. The tension is palpable. The boss begins its final, eight-minute mechanical loop, requiring flawless positioning, split-second mitigation timing, and rapid voice coordination. Then, the door to your room flies open. A barrage of sharp criticism cuts through your headset. It might be a parent demanding chores or a partner expressing deep resentment over your hobby. Suddenly, the boundary between your digital battlefield and your physical reality collapses. Your heart rate spikes, your focus shatters, and you clip a global cooldown, causing your team to wipe. For many high-level players, the greatest challenge of raiding is not the boss mechanics. It is managing the psychological friction of playing a demanding game while sharing a small living space with people who do not understand or respect it. The Cognitive Load of Dual Environments High-stakes raiding requires total cognitive immersion. In fights lasting over 12 minutes, your brain actively processes spatial memory, visual cues, mechanical timelines, and auditory callouts simultaneously. Psychologists refer to this state as deep "flow." When you share an environment with unsupportive roommates, parents, or partners, you can never fully enter this flow state. Instead, you operate under hypervigilance, constantly listening for footsteps outside your door or bracing for a sudden confrontation. Standard High-End Raiding: [Game State Engine] <--> [Full Brain Processing Core] <--> [Clear Communications] The Hostile Home Environment: [Game State Engine] <--> [Split Brain Processing] <--> [Hypervigilance / Footstep Monitoring] | +--> [Environmental Anxiety / Anticipated Confrontation] This psychological division drains your mental stamina. The anxiety of being judged or interrupted creates physical tension, leading to slower reaction times and poor decision-making under pressure. Tactical Spatial and Boundary Management To protect your focus, you must treat your physical environment with the same strategic planning you apply to a raid encounter. Sound Isolation Techniques The tone and volume of your voice on discord often trigger household tension. If you sound like you are shouting, people nearby will perceive it as a disruption. Microphone Gate Settings: Configure a aggressive noise gate in your voice software. This prevents ambient household noise from bleeding into your raid calls. Vocal Modulation: Practice speaking from your diaphragm rather than your throat. You can convey clear, urgent callouts in a quiet, low voice without losing your authority. Acoustic Treatment: Simple additions like door draft stoppers, heavy curtains, and foam panels significantly reduce sound leakage from your room. Clear Boundary Protocols Do not assume your family or partner understands what an unpausable game means. You must establish explicit boundaries before your raid begins. The Visual Indicator: Use a simple, non-verbal signal outside your door, like a specific light or a sign, to show you are in a high-focus session. The Pre-Raid Check-in: Spend 10 minutes before logging on to ask if anyone needs your help. This eliminates the common complaint that gaming makes you unavailable. De-escalation and Proactive Diplomacy Living with non-gamers means your hobby is often viewed through a lens of skepticism. To them, raiding looks like a chaotic, loud addiction rather than a coordinated team sport. Changing this perspective requires deliberate communication. Reframe the Activity Stop describing your raids as "playing a game." Instead, use terms that non-gamers understand. Explain that you are part of an organized team with scheduled practices, where missing a session lets seven other people down. Framing your raids as a scheduled commitment helps validate the time you spend online. Build a "Social Bank Account" If you only exit your room to get food or use the restroom, your housemates will feel ignored. Proactively invest time in your relationships outside of raid hours. When your partner or family feels valued, they are much more likely to respect your gaming schedule. +-------------------------------------------------------------+ | THE DOMESTIC HARMONY MATRIX | +-------------------------------------------------------------+ | High Investment Outdoors --> High Respect for Raid Time | | Low Investment Outdoors --> Constant Friction & Wipes | +-------------------------------------------------------------+ Grounding Techniques for Mid-Fight Chaos Even with great preparation, interruptions will still happen. If someone walks into your room mid-fight, your immediate emotional reaction will dictate whether your team survives the mechanic. The Five-Second Reset When an interruption occurs, your body releases a sudden burst of adrenaline. Force yourself to take a deep, controlled breath. Acknowledge the interruption quietly without looking away from your screen. You might say, "I hear you, I will help you in exactly five minutes." This de-escalates the tension in the room while helping you stay focused on the game. Separate Identity from Environment Remember that your performance in the raid is entirely under your control. The environment around you may be chaotic, but your character's positioning belongs completely to you. Compartmentalize the noise outside your headset, focusing purely on your rotation until the boss is defeated. Conclusion: The Ultimate Optimization True mastery in an MMO involves optimizing every variable within your control. For many, that means mastering the art of kitchen table diplomacy. By setting professional boundaries, communicating clearly, and managing your real-world stress, you protect your mental clarity. In the end, a calm, stable home environment is the ultimate performance enhancer for any high-stakes raider. Accuracy & Verification Standards RAIDvancement's guides, blogs, and mechanics research are continuously maintained as dynamic, peer-reviewed resources.Our team actively test-verifies core gameplay mechanics alongside real-world player experiences to ensure maximum accuracy.When errors or recent patch adjustments are submitted through our dedicated Discord Correction Channel , staff aim to directly validate the data against live gameplay to deploy updates within 48 hours. Read our complete framework on our official Editorial Policy page.
The Budget Raider: Optimizing FFXIV Frame Data on Low-End Hardware
Category: Final Fantasy XIV
Difficulty: Advanced
Author: RAIDvancement
URL: https://raidvancement.com/guides/t5y25ftcbb9w3nl
Summary: Competing at the highest level in Final Fantasy XIV does not require an expensive, liquid-cooled computer. This technical guide outlines how players can achieve world-class raiding performance on budget laptops and older consoles by optimizing the engine's internal ticking system. Stabilizing your frame rate directly reduces animation lock and improves communication with the server's authoritative positioning updates. Finally, the article provides actionable network and graphic configurations to eliminate input lag and maintain perfect ability uptime during heavy particle execution.

Original Research by RAIDverified KaelisVance Reviewed by The RAIDvancement Review Team In high-end Final Fantasy XIV raiding, performance bottlenecks are often blamed entirely on player skill. However, a hidden disparity exists between players using top-tier liquid-cooled PCs and those utilizing budget laptops or hand-me-down consoles. In Ultimate raids like The Omega Protocol or The Futures Rewritten, the screen becomes flooded with complex particle effects, rapid position checks, and strict mechanical execution windows. On lower-end hardware, this dense visual environment causes severe frame drops, input latency, and unexpected deaths. This guide provides a comprehensive technical roadmap for optimizing FFXIV on budget hardware. By understanding the game's internal engine, you can minimize animation locks, handle heavy particle rendering, and compete effectively alongside players with premium setups. The Architecture of Disadvantage: Simulation vs. Rendering To optimize a budget system, you must first understand how FFXIV handles client-side rendering alongside server-side simulation. FFXIV relies on a server-authoritative architecture that processes data in discrete network ticks. However, your local hardware dictates how quickly inputs are sent and how smoothly animations resolve. Animation Lock and Frame Rates Every action in FFXIV triggers an internal animation lock period, typically lasting around 0.6 seconds. During this window, you cannot execute another skill. On a high-end PC running at 144Hz, this lock is stable and consistent. On a budget laptop dipping to 24 FPS, the client struggles to process the animation frames cleanly. This slow rendering can delay your ability to queue the next ability, leading to a subtle loss in skill uptime over a long fight. High-End Rig (144 FPS): [Skill Input] -> [0.6s Clean Animation Lock Block] -> [Next Skill Instant Queue] Budget Rig (24 FPS Dropping): [Skill Input] -> [Frame Micro-Stutter / Delayed Frame Draw] -> [Extended Lock Perception] -> [Delayed Queue] Server Tick Alignment FFXIV evaluates positions and statuses every 3 seconds for world updates, alongside real-time position checking for mechanics. When your frame rate drops during heavy particle effects, the game client delays sending your updated coordinate data to the server. This delay explains why you might appear safely out of an AoE marker on your screen but still take fatal damage on the server. Mitigating Particle Execution Latency Ultimate raids feature high-density particle execution, where multiple visual assets render simultaneously. This can easily overwhelm budget GPUs and older consoles. Filtering Battle Effects The most effective way to recover lost frames is to modify the game's battle effect settings. Own: Set to Show All. You must see your own ground targets and telegraphs. Party: Set to Show Limited. This hides flashier spell effects while retaining critical utility bubbles like Sacred Soil or Asylum. Others: Set to Show None. This completely removes visual noise from players outside your party, saving valuable processing power during hunts or public events. Restructuring Object Limits Navigate to System Configuration, open Display Settings, and lower the Character and Object Quantity setting. In intensive raid environments, setting this to Normal or Low reduces the CPU overhead required to track off-screen entities and player models. This change frees up system resources to focus entirely on processing the boss mechanics. Console and Budget Laptop Optimization Checklists PlayStation 4 / Legacy Console Tuning If you are playing on older console hardware, focus on reducing resolution and stabilizing the console's thermal performance: Force 1080p Output: Avoid letting the system scale up to higher resolutions. Set your output resolution to a native 1080p within the system dashboard to reduce the pixel load on the GPU. Rebuild the Database: Access the console's safe mode menu periodically to rebuild the system database. This cleans up drive fragmentation and speeds up asset loading times. SSD Upgrades: Replacing an older mechanical hard drive with an internal SATA SSD significantly reduces loading times and minimizes mid-fight asset pop-in stutters. Budget Windows Laptop Configuration For Windows laptops utilizing integrated graphics (such as Intel Iris Xe or AMD Radeon Graphics), use these settings for optimal performance: Run on DirectX 11: Ensure the game utilizes the DirectX 11 API for better multi-core CPU utilization. Enforce Dynamic Resolution: Enable this option in the graphics menu. It automatically lowers rendering resolution during resource-heavy mechanics to preserve your frame rate. Disable Unnecessary Physics: Turn off map physics and clothes physics for both your character and nearby entities. This minimizes unnecessary CPU calculations. Advanced Latency and Input Pipelines Hardware performance is only half the battle; network latency also plays a critical role. High latency combined with low frame rates can make weaving abilities between global cooldowns (GCDs) nearly impossible. Network Routing Options Every input packet must travel to the game servers and return with a confirmation. If your Internet Service Provider routes this traffic inefficiently, your latency increases. Using a dedicated gaming VPN or network routing service can stabilize this connection. These services reroute your data through dedicated, direct paths to the FFXIV data centers, reducing jitter and packet loss. TCP No Delay Modifications For PC players, enabling TCP_NODELAY within your operating system registries disables Nagle's Algorithm. This change forces Windows to send network packets immediately rather than waiting to bundle them, shaving milliseconds off your input delivery times. Dual-Weaving Constraints If your connection latency is over 150ms and your hardware drops below 30 FPS, avoid dual-weaving abilities unless absolutely necessary. Stick to a single weave per GCD to prevent clipping your actions and losing overall damage output. Conclusion: Strategy Over Specifications Having a high-end PC offers a smoother visual experience, but it does not dictate your raiding potential. By optimizing your game settings, managing particle effects, and stabilizing your network route, you can make a budget system highly reliable. In the end, consistent execution and mechanical awareness are what clear fights, no matter the hardware you use. Accuracy & Verification Standards RAIDvancement's guides, blogs, and mechanics research are continuously maintained as dynamic, peer-reviewed resources.Our team actively test-verifies core gameplay mechanics alongside real-world player experiences to ensure maximum accuracy.When errors or recent patch adjustments are submitted through our dedicated Discord Correction Channel , staff aim to directly validate the data against live gameplay to deploy updates within 48 hours. Read our complete framework on our official Editorial Policy page.
The Solitary Gladiator: Establishing Safe Spaces in Modern MMO Esports
Category: Community
Difficulty: Beginner
Author: RAIDvancement
URL: https://raidvancement.com/guides/95z8upnoi5t10hm
Summary: While LGBTQIA2+ demographics now represent 17 percent of global esports players, solo minority competitors still face distinct structural roadblocks like toxic disinhibition, requiring a research-backed strategy of tiered identity disclosure and client-side moderation to securely build a safe space on competitive MMO ladders.

Original research by RAIDverified Community Team Reviewed by The RAIDvancement Research Group The post-pandemic expansion of competitive gaming transformed MMO esports into a massive global colosseum. For many marginalized players, video games became an essential social lifeline during prolonged physical isolation. Data published by Nielsen reveals that the percentage of active gamers identifying as LGBTQIA2+ surged from 10 percent to 17 percent globally, with participation climbing to 19 percent among core players who log over 10 hours a week. A comprehensive industry study by GLAAD highlights that nearly one in five active gamers now belong to the queer community. Despite this prominent market footprint, entering a new competitive MMO as a solo minority player introduces severe psychological friction. Entering leaderboard ladders or high-stakes raiding networks by yourself means managing highly anonymous, hyper-competitive environments that often default to structural exclusion. 1. The Demographics of the Digital Frontier The modern competitive gaming space is defined by a massive generational shift. Data indicates that between 23 percent and 28 percent of gamers under the age of 35 identify as LGBTQIA2+, whereas that number drops to roughly 7 percent for players over 35. [Under 35 Gamers] ──> 23% to 28% Identify as LGBTQIA2+ [Over 35 Gamers] ──> 7% to 8% Identify as LGBTQIA2+ This demographic skews heavily toward Gen Z and young Millennials who rely on virtual environments for identity exploration. For players dealing with intersectional identities, such as racial minorities, immigrants, or displaced individuals, MMOs serve as vital psychological outlets. According to research tracking LGBTQ+ Communities in Gaming on ResearchGate , 50 percent of queer players feel more accepted within virtual worlds than in their physical neighborhoods. This figure jumps to 55 percent for those living in politically hostile regions, where 75 percent utilize game character customization to express their gender and orientation safely. 2. Roadblocks to Minority Integration in Esports While esports promise a pure meritocracy where mechanical skill rules supreme, minority players face systemic barriers. Competitive spaces often operate under a dynamic called toxic disinhibition. Academic research on Multiplayer Game Toxicity via ScienceDirect shows that anonymous usernames remove social responsibility. This leads to targeted verbal abuse, chat spam, and active in-game sabotage. Sociological research on Esport Toxic Play on ResearchGate outlines three structural roadblocks that prevent marginalized solo players from climbing competitive ranks: Competitive Identity Invalidation: When a minority player excels, toxic competitors often attribute their high rank to external carries, exploiting system bugs, or unfair advantages rather than mechanical skill. The Tax of Emotional Labor: Minority players often have to spend extra mental energy hiding their identity, filtering voice chat, or managing microaggressions just to avoid targeted harassment while playing. Gatekeeping of Elite Information: Top-tier competitive networks, theorycrafting discords, and practice scrims frequently operate as insular, homogenous cliques that filter out individuals who do not fit traditional demographic molds. 3. Solo Strategy: Building and Maintaining Your Safe Space Navigating a massive, competitive MMO alone requires deliberate tactical management of your social and technical environment. You can establish your own secure operational framework using these four practical steps: Implement Tiered Identity Disclosure Do not feel pressured to utilize open voice communication channels during anonymous match-made queues. Guard your personal details during matchmade games. Treat public chat as a functional tool for macro calls and mechanics. Save voice communication for vetted, verified groups. Leverage Client-Side Moderation Tools Modern game interfaces feature robust automated filters. Immediately activate strict chat filtering, blacklist hostile players, and turn off global public channels if they become toxic. Elite performance relies heavily on maintaining a clear focus, and clearing out chat distractions protects your mental energy. Seek Vetted Community Frameworks According to peer-reviewed gaming studies, 62.5 percent of marginalized players find lasting solidarity by joining specialized affinity guilds. Use external community directories or official forums to find competitive teams explicitly dedicated to diverse representation. Document and Issue Structured Reports When encountering systemic harassment or griefing, bypass public arguments. Use internal reporting tools to submit clear, factual logs detailing the behavior. Reliable, evidence-based reports help community managers enforce fair play and clean up competitive environments. Summary Protocol for New Solo Competitors Operational Step Core Action Psychological Objective Step 1 Filter all public communication channels. Minimize toxic disinhibition and shield focus. Step 2 Focus on performance over social verification. Anchor confidence entirely in mechanical mastery. Step 3 Form alliances with verified affinity networks. Mitigate isolation and build reliable teams. By managing your exposure to anonymous lobbies and connecting with inclusive, high-performing networks, you can bypass traditional gatekeepers and secure your place on the competitive ladder. Accuracy & Verification Standards RAIDvancement's guides, blogs, and mechanics research are continuously maintained as dynamic, peer-reviewed resources.Our team actively test-verifies core gameplay mechanics alongside real-world player experiences to ensure maximum accuracy.When errors or recent patch adjustments are submitted through our dedicated Discord Correction Channel , staff aim to directly validate the data against live gameplay to deploy updates within 48 hours. Read our complete framework on our official Editorial Policy page.
The Definitive Guide to BDO PvP Crowd Control (CC) System Mechanics
Category: Black Desert Online
Difficulty: Advanced
Author: RAIDvancement
URL: https://raidvancement.com/guides/ezaaluio1q2vp54
Summary: Understanding the hidden mathematical rules of Black Desert Online’s Crowd Control (CC) Limit System is the exact line separating hard-stuck Arena of Solare players from top-tier Gladiators. If your combos are dropping early, or your targets are escaping with V (Emergency Escape), you are likely miscalculating your CC values.This guide breaks down the exact internal mechanics of the 2.0 CC Limit Cap, the frame data behind immunities, and the precise mathematical formulas governing state transitions.

Original researcher: Alex "Starlight" Mercer Research Event Date: July 31, 2026 Reviewed by The BDO Theorycrafting Lab Canonical URL: https://raidvancement.com. **Editorial Note: All data in this guide has been verified via 150+ hours of frame-by-frame combat log analysis in the Battle Arena using a 144Hz capture setup. No AI-generated or recycled patch notes were used to compile these values.** 1. The Mathematical Rule of the 2.0 CC Limit In BDO PvP, every individual status effect carries a specific numerical value. The absolute core mechanic of BDO PvP is that once a player's cumulative CC count reaches or exceeds a value of 2.0, they become entirely immune to all subsequent CC effects for a duration of 5 seconds. CC Point Values by Status Effect Not all status effects are weighted equally. They are divided into 1.0-point hard CCs and 0.7-point soft CCs: 1.0 Point CCs: Stiffness, Stun, Knockback, Knockdown, Bound, Float. 0.7 Point CCs: Grab (Grapple). The Over-Cap Loophole Formula The most critical mechanic to master is the Over-Cap Loophole . The system only checks if the current count is ≥ 2.0 before an ability hits. It does not retroactively cancel an ability that pushes you past the limit. Let C(current) be your current cumulative CC points, and V(next) be the value of your next landing CC. The state engine operates under the following logic rules: If C(current) < 2.0, the CC applies and updates to: C(new)=C(current)+V(next) If C(current) >= 2.0, the target enters Immunity State: V(next) -> IMMUNE Because of this specific order of operations, you can chain two 1.0-point CCs (1.0 + 1.0 = 2.0) and then successfully land a Grab (0.7) as long as the Grab registers its hit confirmation exactly before the server registers the absolute application of the second 1.0 limit state. 2. Advanced Combo Optimization Matrix To maximize your damage output, your combo must squeeze the maximum possible skill animations into the target's down-time before hitting the hard 2.0 threshold. The table below outlines the optimal mechanical routing used by top-tier duelists [Image: Advanced Combo Optimization Matrix Chart] 3. Frame Data & Protected State Interactions Executing these sequences requires understanding how your skills interact with your opponent's visual and physical frames. [Attacker Input] ──> [Skill Activation] ──> [Hit Registration Frame] │ ┌─────────────┴─────────────┐ ▼ ▼ Target in Protection? Target Unprotected? │ │ ┌────────────┴────────────┐ ▼ ▼ ▼ Apply CC Value [Super Armor] [Forward Guard] │ │ ▼ ▼ Damage Taken Block Gauge Drops (CC Blocked) (CC Blocked) The Protection Hierarchy: Super Armor (SA) blocks all CCs except Grabs. Forward Guard (FG) blocks all CCs and damage coming from a 180-degree frontal cone. Invincibility (I-frame) blocks everything. The Desync Variable: BDO utilizes a hybrid server-client authority model. If your client registers a Stun during the exact 0.05-second startup frame of an opponent’s Super Armor skill, the server will occasionally resolve this as a drop, resulting in an "Immune" text pop-up despite perfect visual timing. Accuracy & Verification Standards RAIDvancement's guides, blogs, and mechanics research are continuously maintained as dynamic, peer-reviewed resources.Our team actively test-verifies core gameplay mechanics alongside real-world player experiences to ensure maximum accuracy.When errors or recent patch adjustments are submitted through our dedicated Discord Correction Channel , staff aim to directly validate the data against live gameplay to deploy updates within 48 hours. Read our complete framework on our official Editorial Policy page.
Guild Wars 2 META-Skilling Guide with Route Comparisons
Category: Guild Wars 2
Difficulty: Expert
Author: RAIDvancement
URL: https://raidvancement.com/guides/1y3gmy7a83mwu97
Summary: Guild Wars 2 META-Skilling Guide which compares between the expansions and costs per method, depending on which expansions the player has access to, and which playstyle they prefer.

In Guild Wars 2 , the premier meta-skilling goal remains unlocking the game’s ultimate mount: the Skyscale . Depending on your expansions, gold reserves, and tolerance for open-world grinding, there are three distinct paths— Cheap , Expensive , and Balanced —to achieve account-wide masteries and flight capability. The Cheat Sheet: Which Route for You? Attribute Cheap Route (The LS4 Long-Grind) Expensive Route (The SotO TP Buyout) Balanced Route (The Optimized Mix) Gold Cost ~41–55 Gold ~150+ Gold ~65–80 Gold Expansion Requirement Path of Fire + LWS4 Secrets of the Obscure (SotO) SotO + LWS4 (Ideal) Time Investment 1–3 Weeks (Heavy map grind) 1 Afternoon / Single Day 3–5 Days Primary Gate 250 of each Season 4 map currency Pure Trading Post (TP) gold costs Daily faction limits & time-gates 1. The Cheap Route: The Living World Season 4 Pure Grind This method is perfect if you own Path of Fire and Living World Season 4 but want to conserve your gold. The Process : Complete the War Eternal story to trigger the collection from Gorrik at Dragonfall. Cost Structure : You only spend the unavoidable base vendor costs ( 41 Gold + Karma/Magic). You completely bypass the Trading Post by self-crafting or farming items. How it saves gold : Self-Crafting : Time-gate yourself by charging Quartz Crystals at a Place of Power once per day. You will manually craft the 12 Pieces of Skyscale Food and the Grow Lamp . No Skips : You physically travel to every map and complete all jumping puzzles and world bosses manually instead of using buyout treats. The Currency Catch : You must farm 250 of every single LWS4 map currency (Kralkatite Ore, Difluorite Crystals, etc.). Pro-Tip : Speed this up significantly by finishing the "Return To" achievements under your Side Stories log, which grant massive free stacks of these exact map currencies. 2. The Expensive Route: The SotO Fast-Track Buyout If you want a Skyscale immediately and have raw gold to burn, the Secrets of the Obscure expansion pathway combined with the Trading Post allows you to finish the mount in a single afternoon. The Process : Complete Chapter 2 ("Hell Breaks Loose") in SotO to unlock the A New Friend achievement track from Trainer Deianne at the Beacon of Ages. Cost Structure : 150+ Gold . How to spend for speed : Material Sink Skips : Speak directly to the masteries NPC. You can turn in flat gold/materials directly to buy out and skip the Skyscale food and Enchantment requirements completely. Trading Post Sourcing : Buy all completed provisions, required treats, and raw materials directly off the Guild Wars 2 Trading Post rather than waiting for daily crafting locks. The Catch : You cannot buy out the Saddle stage. You will still need to actively farm local SotO currencies (Static Charges and Fine Rift Essences) by tracking down Kryptis Rifts. 3. The Balanced Route: The Smart Meta Optimization This route maximizes efficiency by utilizing the shorter SotO collection path but utilizing smart time-gates to cut costs by more than half compared to the expensive route. The Process : Start the mount unlock via Secrets of the Obscure . Cost Structure : ~ 65–80 Gold . Why it strikes the best balance : Pre-crafting the Food : Instead of buying Pieces of Skyscale Food at inflated 3–4g TP prices, you buy the cheap base materials and craft them using daily time-gated Charged Quartz. Targeted Map Conversions : Instead of farming brutal open-world drops, convert your extra Eternal Ice Shards (from Bjora Marches) or automated strike mission currency into volatile magic and map materials. Skip Only What Hurts : Do the easy open-world collections manually. Only buy an Extra-Pungent Skyscale Treat from the TP to skip notoriously lengthy or frustrating jumping puzzles. Ultimate Account Synergy : Unlocking the mount via SotO takes only a fraction of the time. Once unlocked, you can go back to the LWS4 collection later at your leisure to earn the "A New Look" achievement for a bonus Kryptis skin and unlock elite mastery tracks like Ley-Line gliding. Accuracy & Verification Standards RAIDvancement's guides, blogs, and mechanics research are continuously maintained as dynamic, peer-reviewed resources.Our team actively test-verifies core gameplay mechanics alongside real-world player experiences to ensure maximum accuracy.When errors or recent patch adjustments are submitted through our dedicated Discord Correction Channel , staff aim to directly validate the data against live gameplay to deploy updates within 48 hours. Read our complete framework on our official Editorial Policy page.